
How to Cap the Free Edge Without Bulky Nail Tips
Learn what a properly sealed nail edge looks like, how the technique is performed, and which mistakes can make the tip thick, rough or poorly finished.
Capping the free edge means carrying a thin layer of compatible nail product across the front edge instead of allowing the coating to stop abruptly on the upper surface. It is a small finishing technique used in many manicure systems, including some gel-polish applications. The correct result is subtle: smooth coverage at the tip with no heavy underside bead and no product touching the skin.
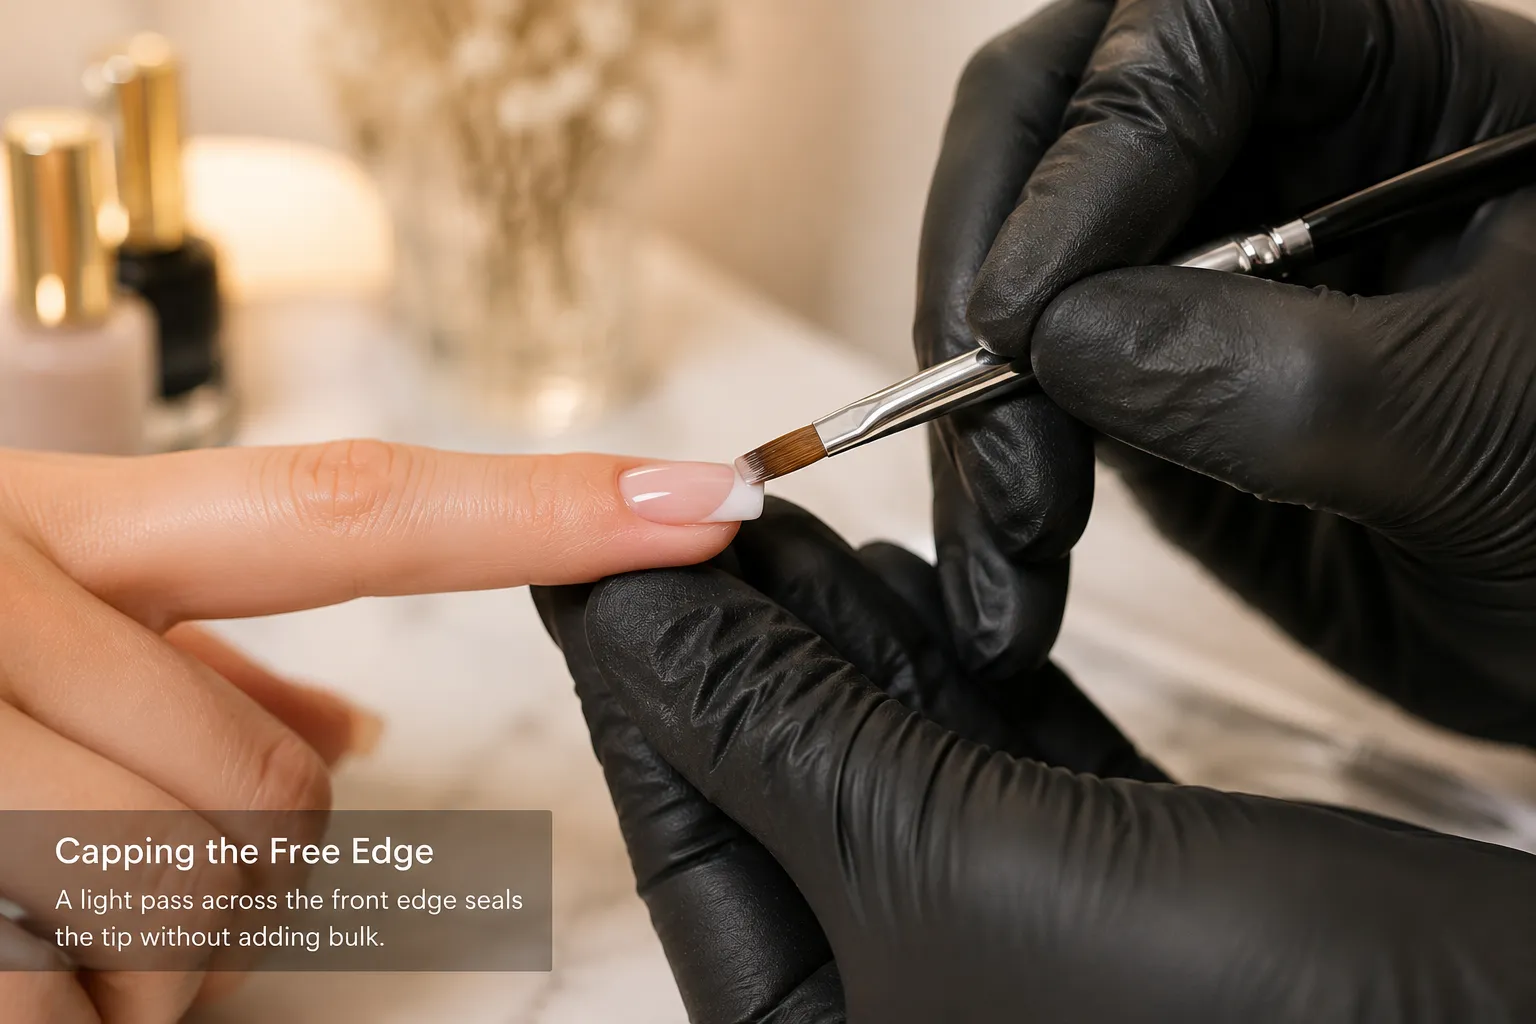
Remove excess product from the brush, position it at the front edge and make a light pass across the accessible free edge. The exact layer or layers that should be sealed depend on the product system, so manufacturer instructions take priority over a universal capping routine.
What Is the Free Edge?
The free edge is the part of the nail plate that extends beyond the fingertip. On short nails it may be a narrow line; on longer shapes it forms a much more obvious front boundary. It is also where the applied coating reaches its terminal edge.
Because the tip repeatedly meets keyboards, clothing, hair, packaging and other surfaces, wear often becomes noticeable there. Capping does not make a manicure indestructible, but it can remove an exposed stopping line from the front of the coating.
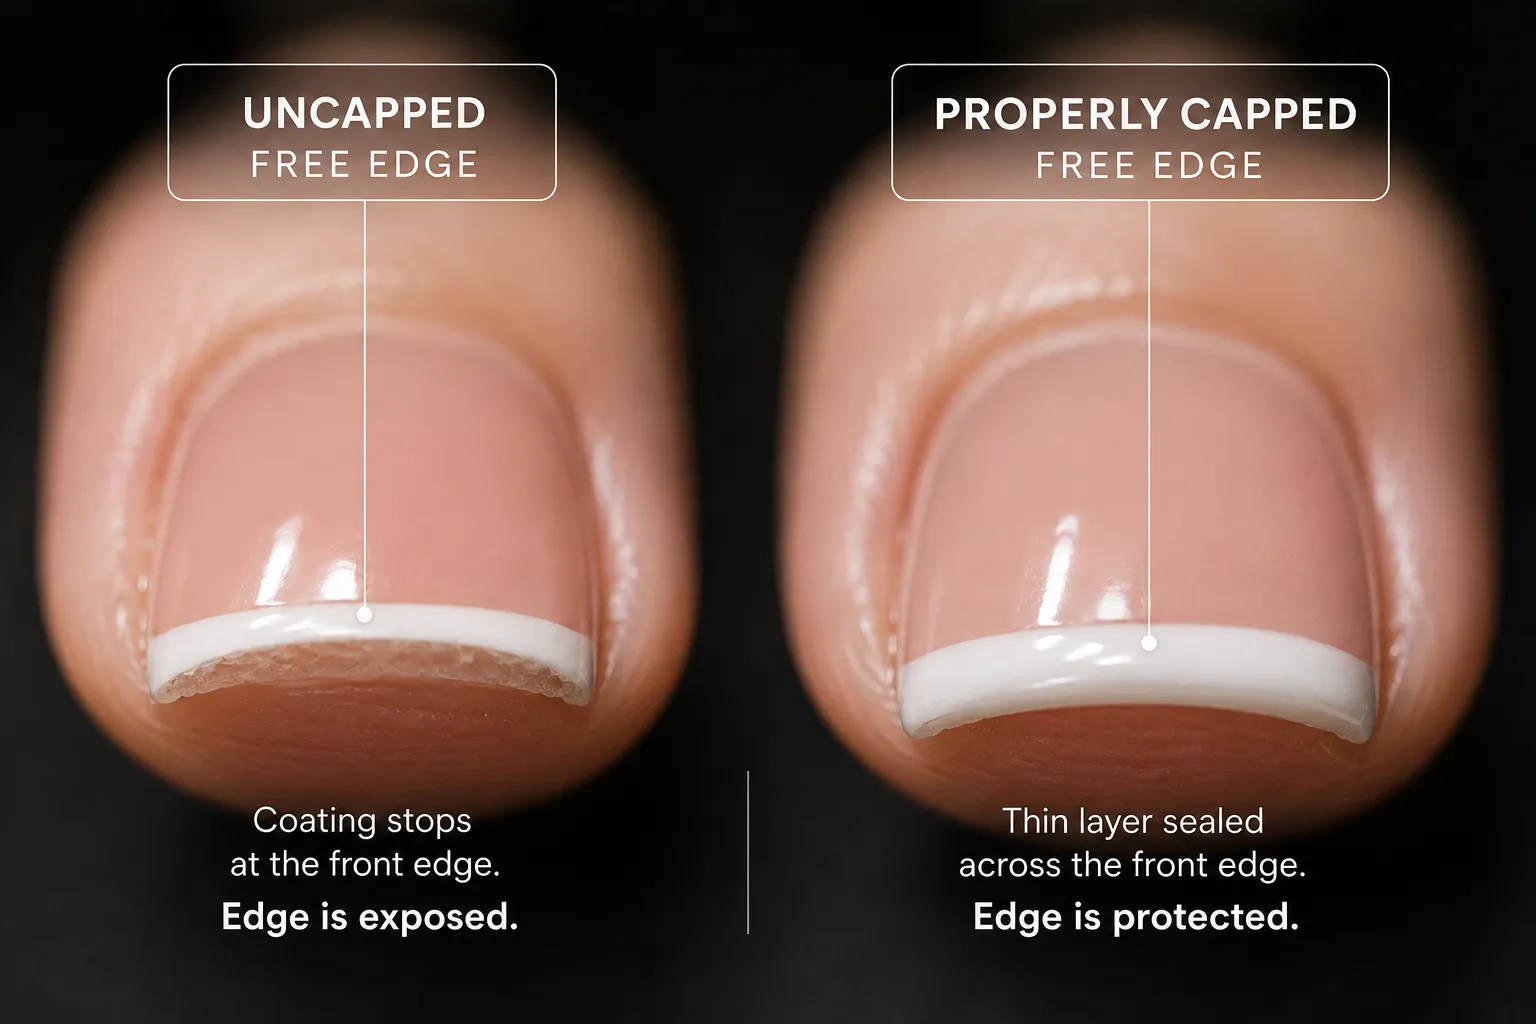
A cap should not become a thick ridge beneath the nail. Excess product can make the edge bulky and may reach surrounding skin. For gel products, uncured material should be kept off the skin and cured according to the instructions for the compatible system.
Does Capping the Free Edge Really Help?
It can help with one specific failure point: wear that begins where the coating ends at the front edge. Some professional gel-polish systems explicitly instruct users to seal the free edge during application. For example, CND’s SHELLAC application guidance includes sealing the free edge as part of the service. That does not mean capping is the sole determinant of longevity.
Preparation, product compatibility, layer thickness, nail flexibility, structural support, curing and everyday impact can all affect wear. If a manicure is lifting at the cuticle or cracking through the stress area, adding more product to the free edge is unlikely to solve the underlying problem.
| What You See | Could Edge Coverage Matter? | Also Check |
|---|---|---|
| Wear starts at the very tip | Yes, potentially | Daily impact, layer thickness and edge finish |
| Chrome wears at the tip | Potentially | Top-coat coverage and the chrome system used |
| Lifting near the cuticle | Usually no | Preparation, contamination and skin contact |
| Crack through the stress area | Usually no | Length, structure, apex and impact |
| Peeling across the nail | Usually no | Adhesion, product compatibility and nail condition |
How to Cap the Free Edge
The exact procedure varies by lacquer or gel system, but the physical principle is simple: use very little product and finish the front boundary cleanly. If your product instructions specify sealing the free edge, use their stated layer sequence, cure time and compatible lamp or top coat.
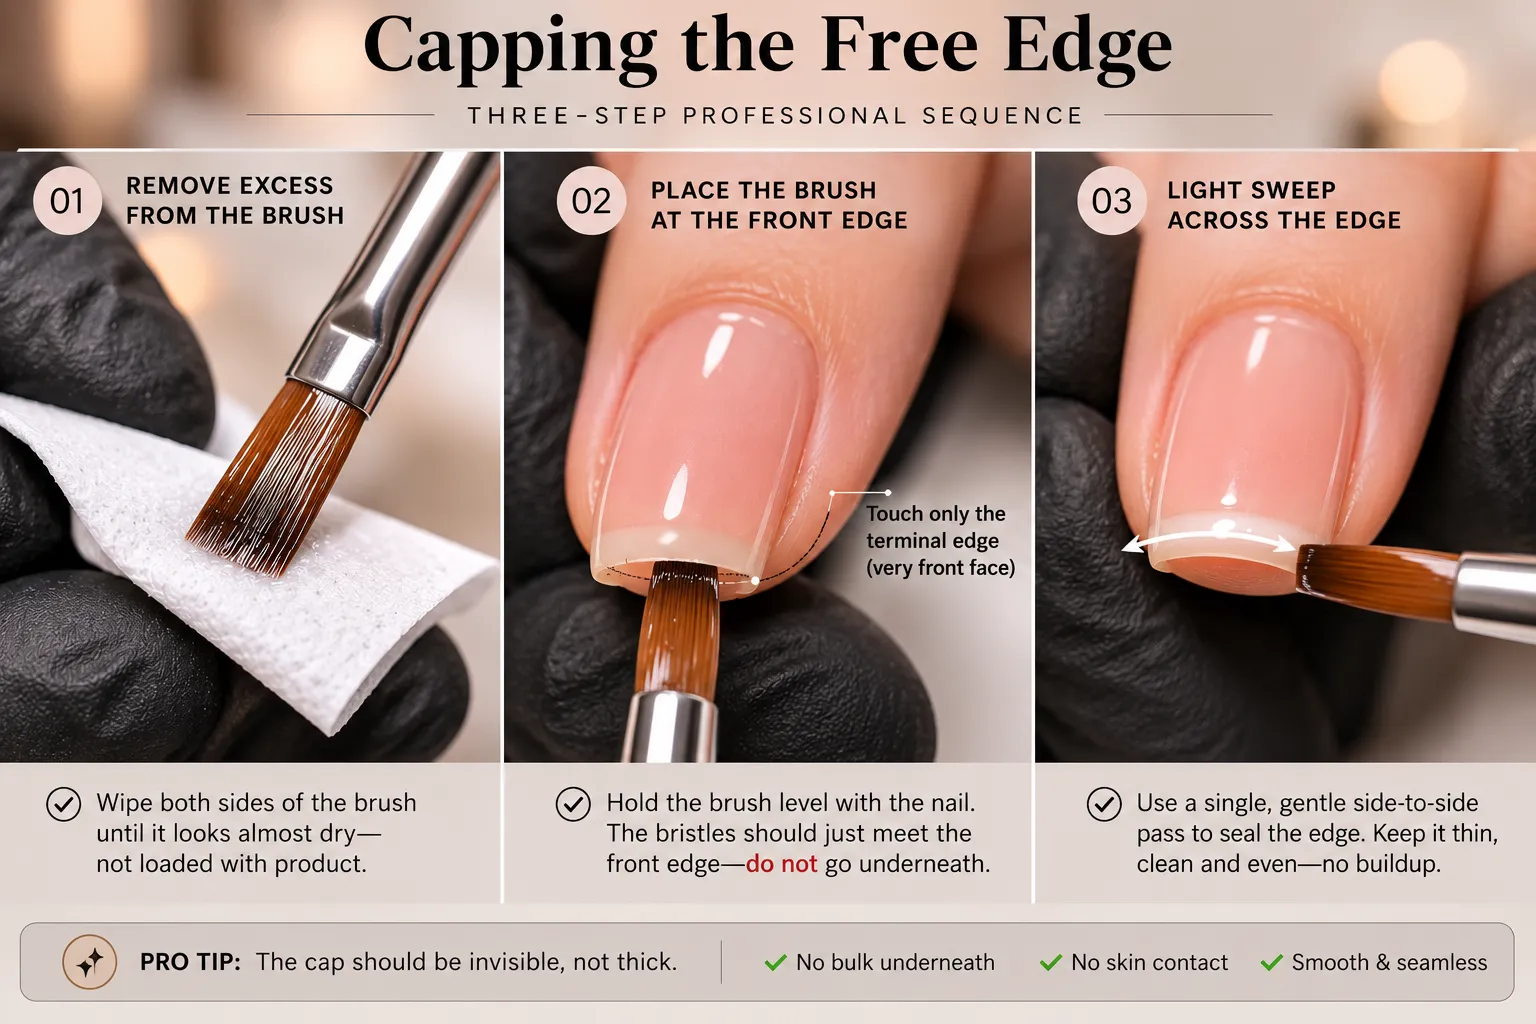
Confirm which layer should be sealed and the required application and curing method.
The brush should carry enough material to cover the edge, not enough to create a drip.
Move across the accessible front edge without loading product beneath the nail.
Correct any skin contact, heavy bead or uneven edge before drying or curing as appropriate.
Regular polish can be capped at home with a nearly unloaded brush. Gel requires stricter product compatibility, skin-contact control and correct curing. Do not improvise cure times or assume that any lamp works correctly with every gel system.
What Should a Properly Capped Edge Look Like?
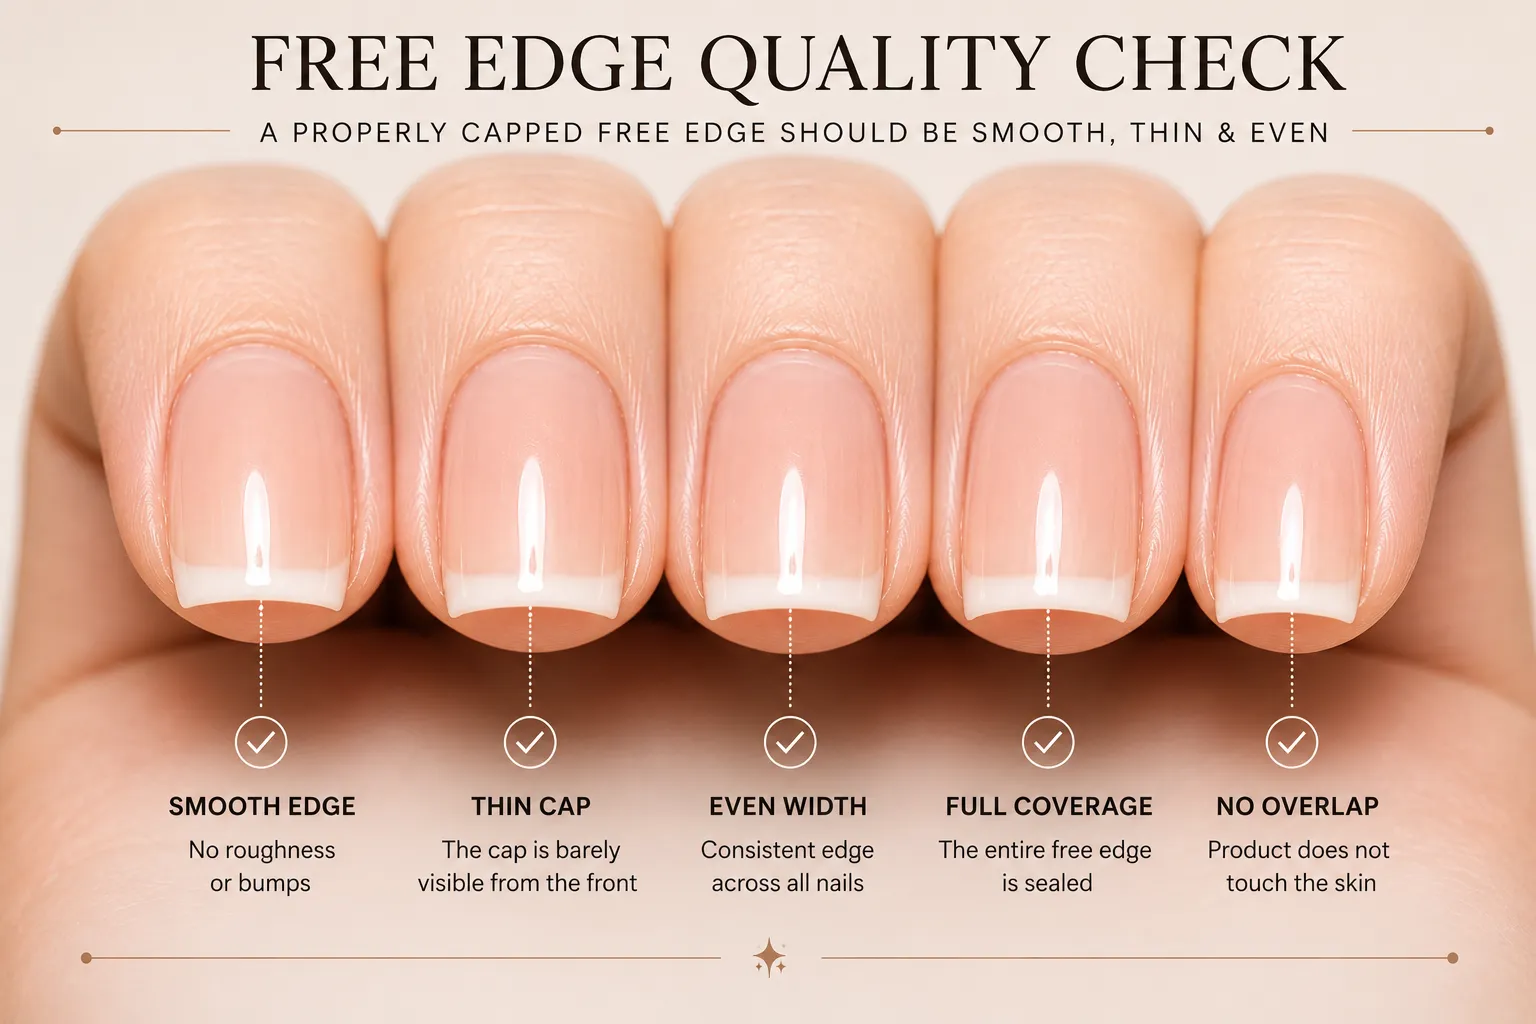
Continuous Coverage
No obvious exposed strip where the coating abruptly stops at the tip.
Minimal Thickness
The edge should not have a heavy bead or obvious underside ledge.
No Skin Contact
Wet or uncured product should remain off the fingertip and surrounding skin.
Smooth Finish
A light touch with the pad of another finger should not reveal an obvious sharp ridge or rough snag.
Why the Free Edge Matters on French Tips
French designs place visual attention directly on the tip, so front-edge wear can be especially noticeable. A crisp classic French, dark red French tip or reflective chrome French can make an exposed or worn terminal edge easier to see.
The same principle applies to micro French tips. Their painted line may be extremely fine, but the nail still has a physical front edge that needs a clean finish. For more design options, see the complete French Manicure Styles & Nail Design Guide.
Classic, Red & Dark Tips
Strong color contrast makes thinning and exposed spots at the edge easier to notice.
Chrome French
Tip wear can interrupt the reflective finish, so complete compatible top-coat coverage matters.
Micro French
The movement must be smaller because there is less accessible free edge and less room to avoid the fingertip.
Common Free-Edge Capping Mistakes
Using Too Much Product
A loaded brush can create a visible bead or collect product beneath the nail.
Touching the Skin
Do not leave wet or uncured nail product on the fingertip or surrounding skin.
Using One Rule for Every System
Different products can specify different layer sequences, application methods and cure requirements.
Filing Through the Finished Edge
Filing after the final coating can remove edge coverage that was just created.
Ignoring Very Short Nails
Short nails can still have an accessible edge, but the brush movement must be proportionally smaller.
Sealing Over Existing Lifting
A new top layer does not restore adhesion beneath material that has already lifted or separated.
If an enhancement is lifting, cracked, painful, discolored or otherwise abnormal, simply sealing over it is not a repair. The existing service should be assessed and appropriately maintained or removed. Persistent natural-nail or skin concerns may require medical advice.
Can You Cap the Free Edge Yourself?
With regular polish, yes. Apply the surface layer normally, remove most excess polish from the brush, angle the fingertip toward you and make a light pass across the accessible front edge. Clean accidental skin contact promptly and allow the coating to dry according to its instructions.
Gel products require more caution. Use compatible products and the specified curing equipment, keep uncured material off the skin and follow the manufacturer’s directions. The FDA’s nail-care product guidance also notes that some nail products can cause allergic reactions in susceptible users. If you develop redness, swelling, pain or another reaction after using a nail product, stop using it and seek appropriate medical advice.
Is Capping the Free Edge Worth Doing?
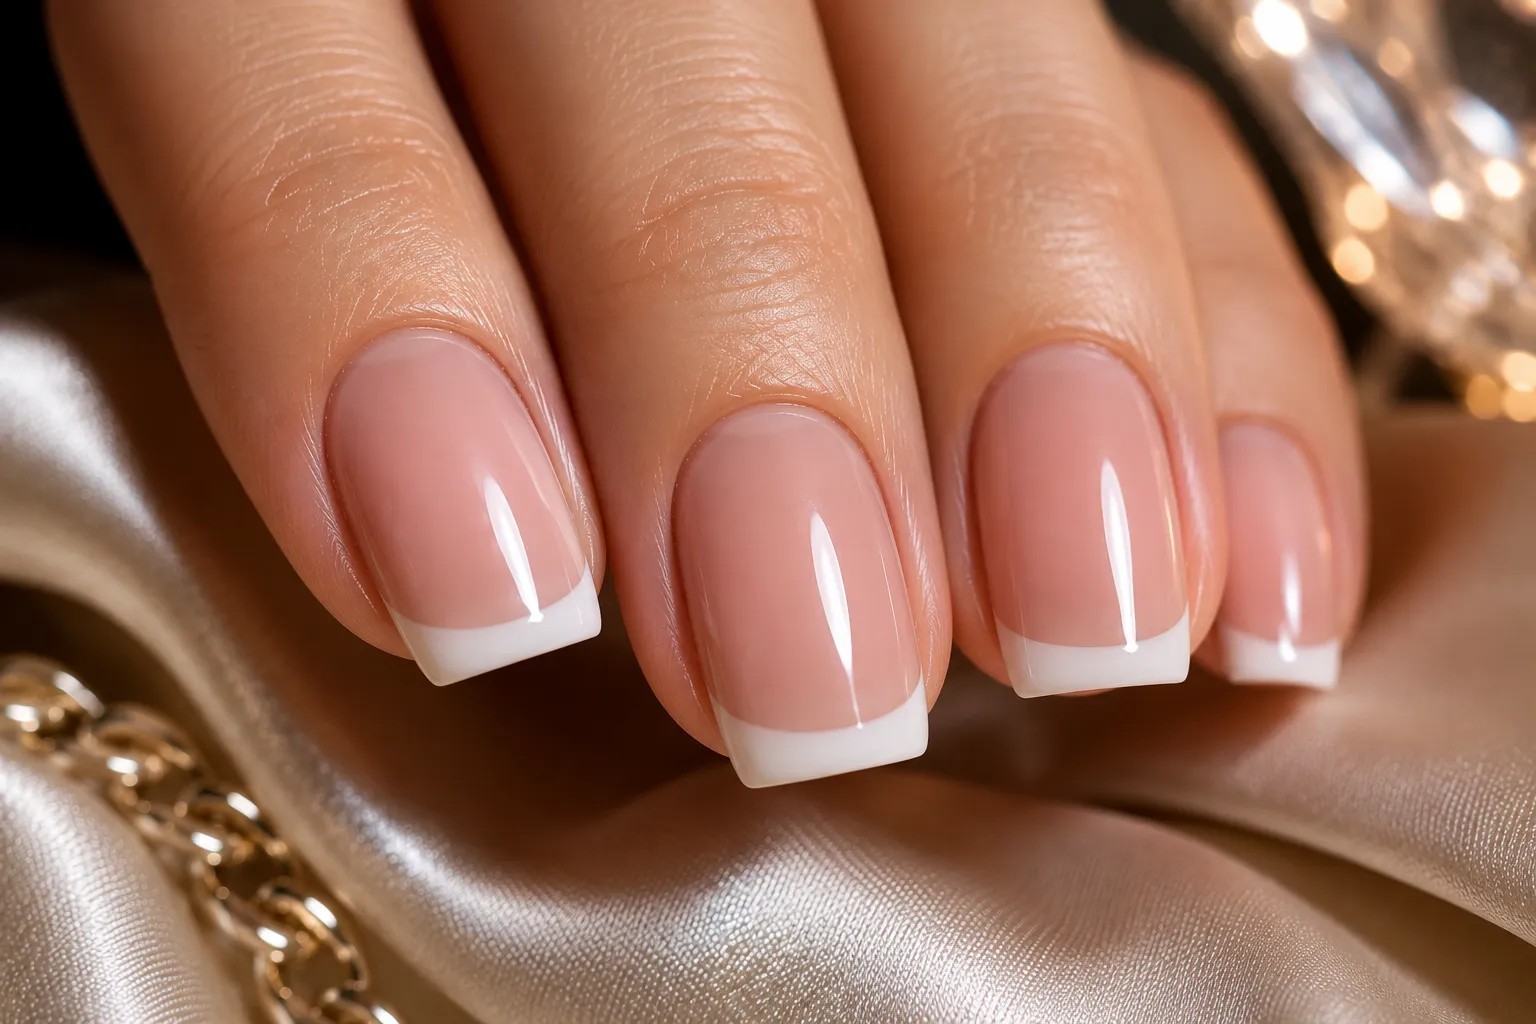
Yes—when the product system calls for it and the technique is kept thin. Capping gives the coating a cleaner front termination and can help reduce wear associated with an exposed edge. It is particularly useful when tip wear would be visually obvious, as with high-contrast French or reflective finishes.
It is not a substitute for correct preparation, structure or curing, and it cannot repair existing lifting or cracks. Think of it as a finishing detail: useful when executed correctly, but only one part of a durable manicure.
Free-Edge Capping FAQs
What does capping the free edge mean?
Capping the free edge means applying a thin continuation of the compatible nail coating across the front edge of the nail. The aim is clean edge coverage without creating a thick bead underneath.
Should every layer be capped?
Not as a universal rule. Some systems instruct technicians to seal the free edge on particular layers, while application methods vary by product. Follow the instructions for the exact base, color and top-coat system being used.
Does capping the free edge prevent chipping?
It can help reduce wear that begins at an exposed front edge, but it cannot prevent every chip. Preparation, nail flexibility, impacts, product compatibility, structure and correct curing also affect wear.
Can very short nails be capped?
Yes, when there is an accessible free edge. Very short nails require minimal product and careful brush control so uncured or wet product does not contact the fingertip or surrounding skin.
How can I tell whether the free edge is properly capped?
Inspect the nail from the front under good light. The coating should look thin, smooth and continuous across the edge, without an exposed strip, bulky ridge, drip or product on the skin.