
Glazed Donut French Tip Nails: Best Styles & Expert Guide
A visual guide to luminous French edges, milky bases, pearlescent finishes, and salon-quality execution.
Glazed donut French tip nails combine the recognizable free edge of a classic French manicure with a thin pearlescent veil and a glassy topcoat. The best versions still read clearly as French tips: the base remains sheer, the tip remains visible, and the glaze softens the contrast without turning the manicure into full chrome.
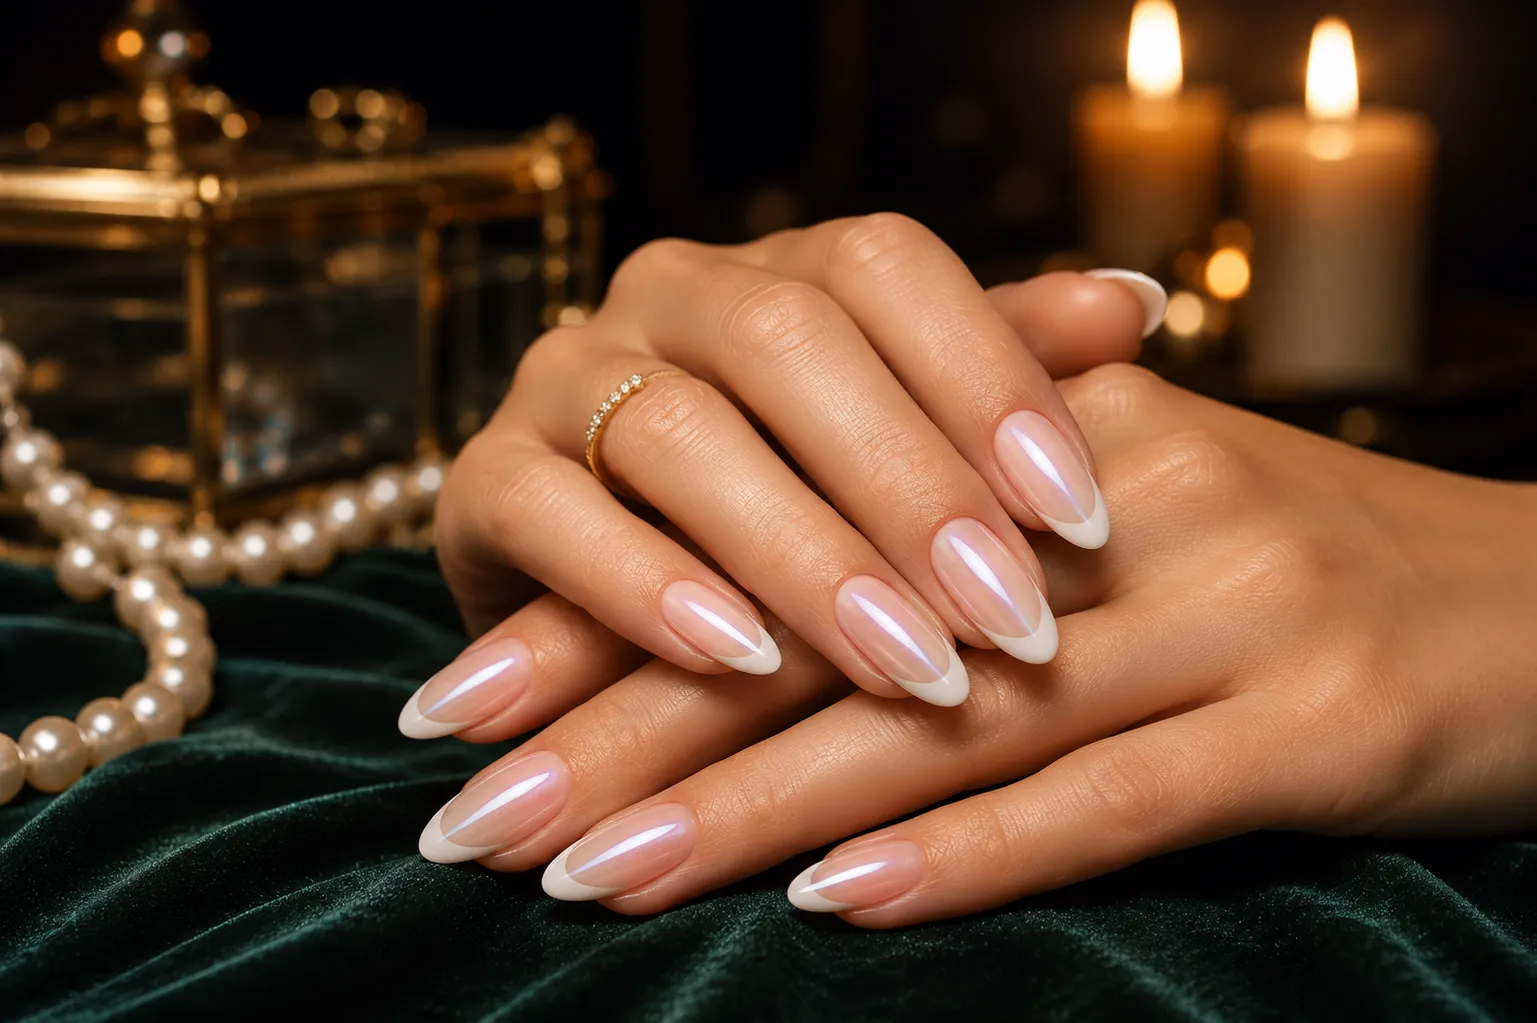
Glazed Donut French Tips at a Glance
Six decisions determine whether the manicure looks luminous, cloudy, metallic, or properly French.
Signature
A sheer base, a visible French edge, fine pearl reflection, and a smooth glassy surface.
Best proportion
Micro tips on short nails; medium smile lines on almond, square, squoval, and coffin shapes.
Correct reflection
Soft, silky, and pearlescent—not glittery, chalky, or mirror-metallic.
Base language
Cool milk feels icy; blush romantic; vanilla warm; near-clear glaze especially natural.
Most versatile shapes
Almond, square, squoval, short round, and restrained coffin.
Quality test
Even pearl density, visible tip structure, continuous reflection, and no cloudy patches.
Choose Your Glazed French Look
Start with the look rather than the product. Save the version closest to your goal, then use the technical sections below to explain the base, tip width, and pearl intensity to your technician.
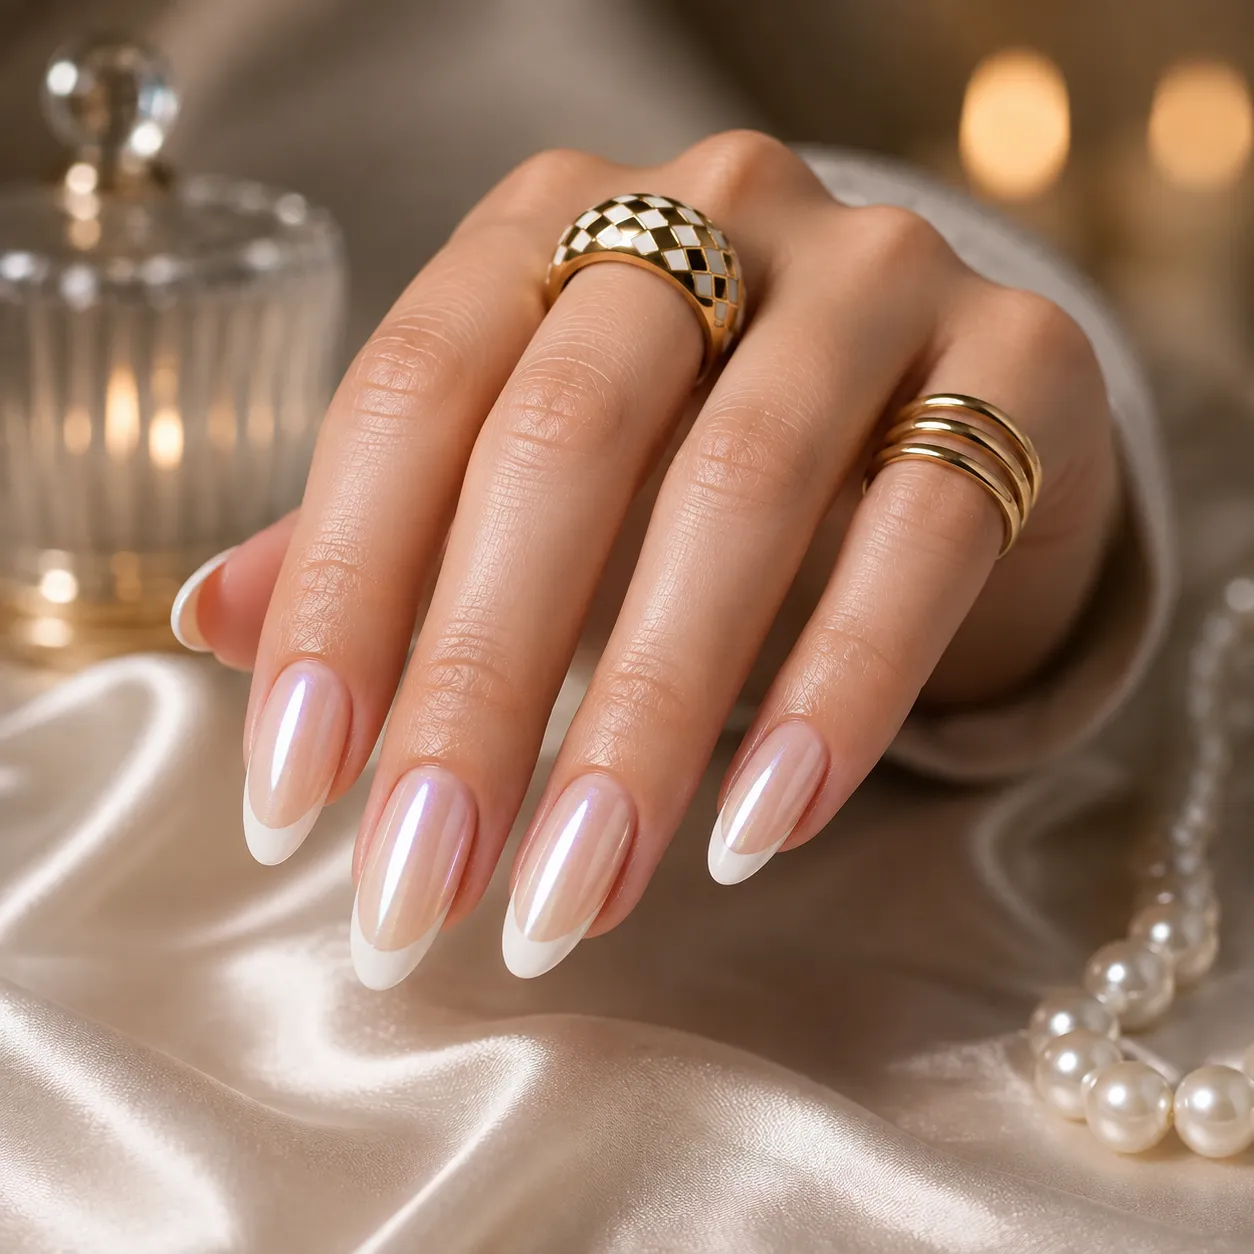
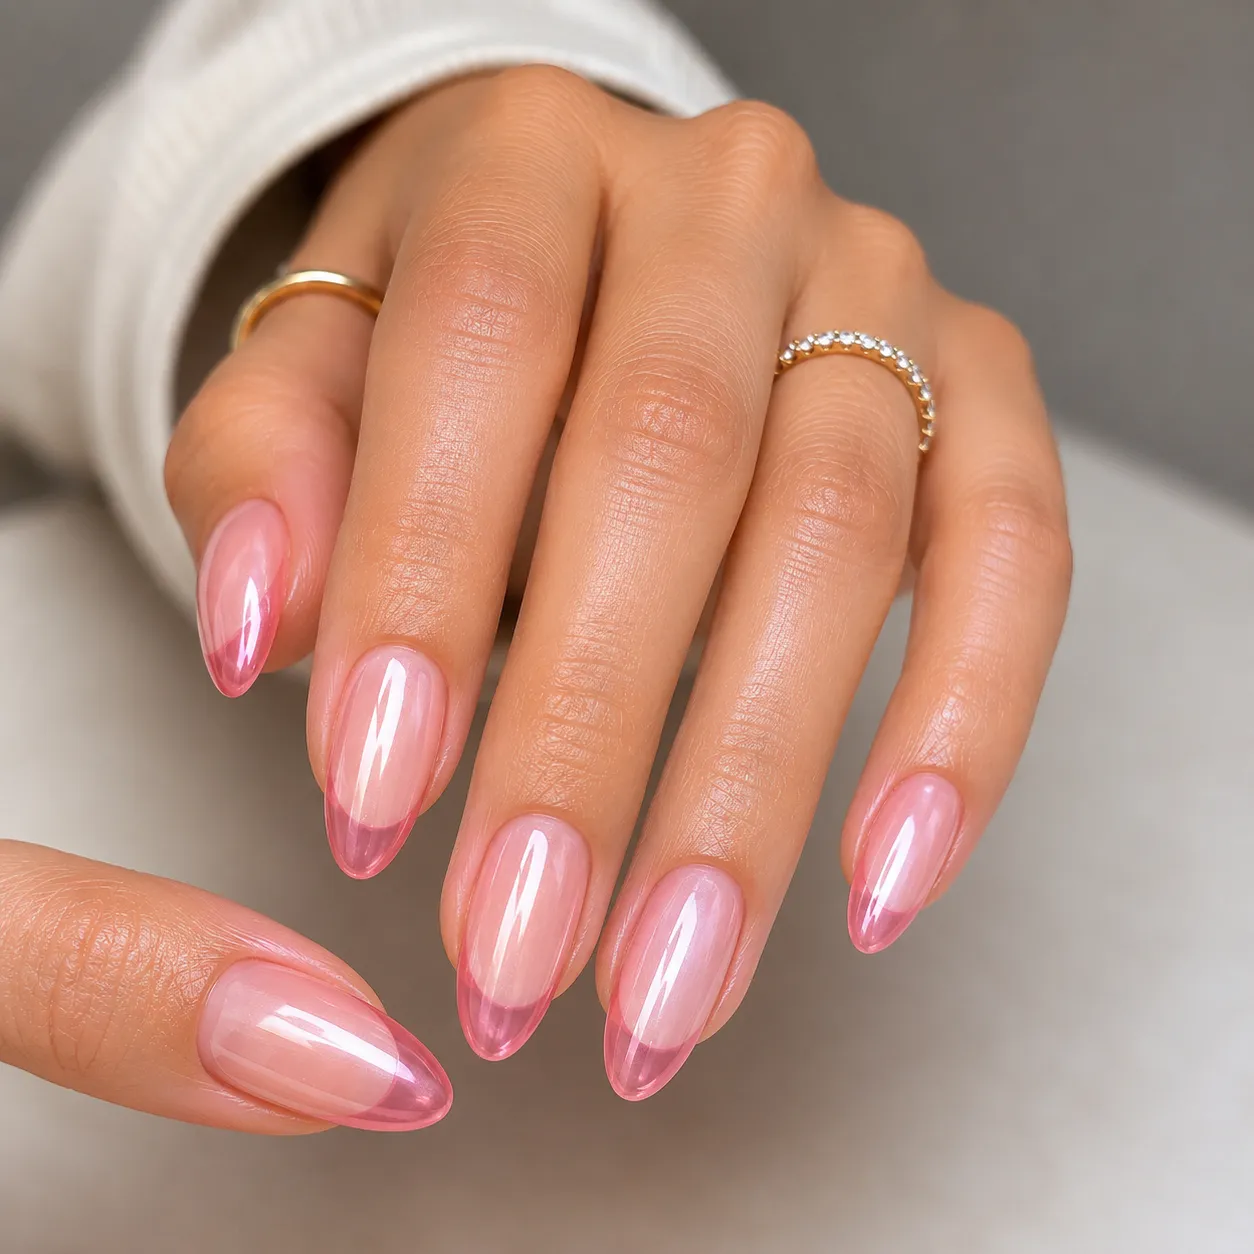
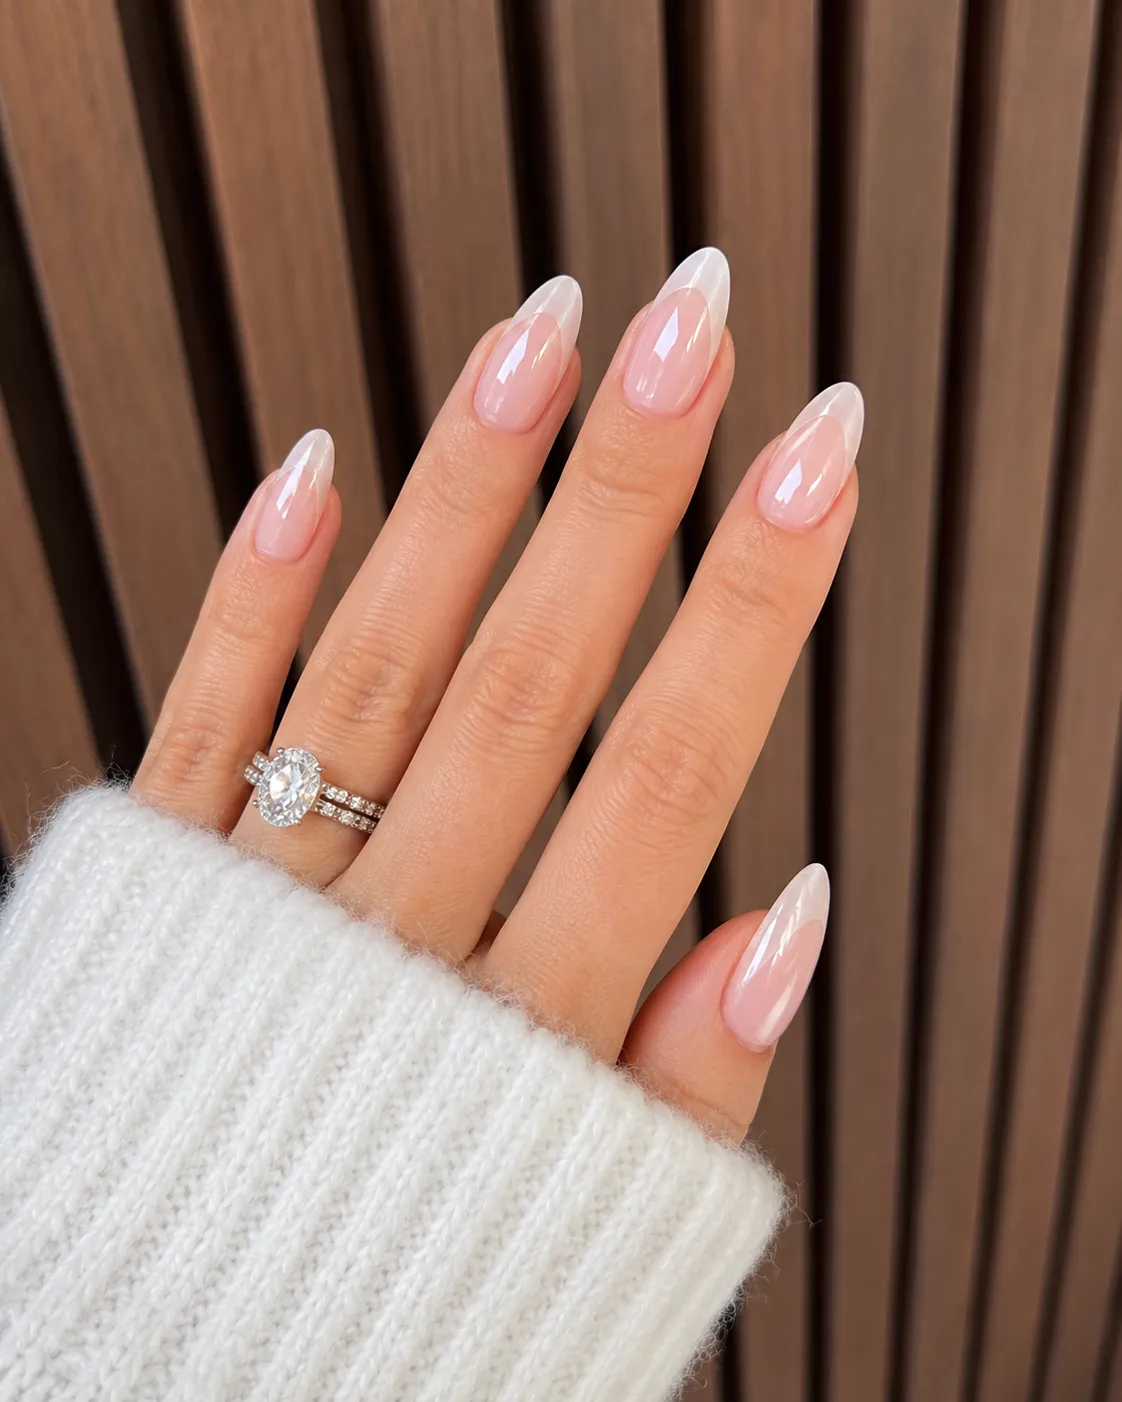
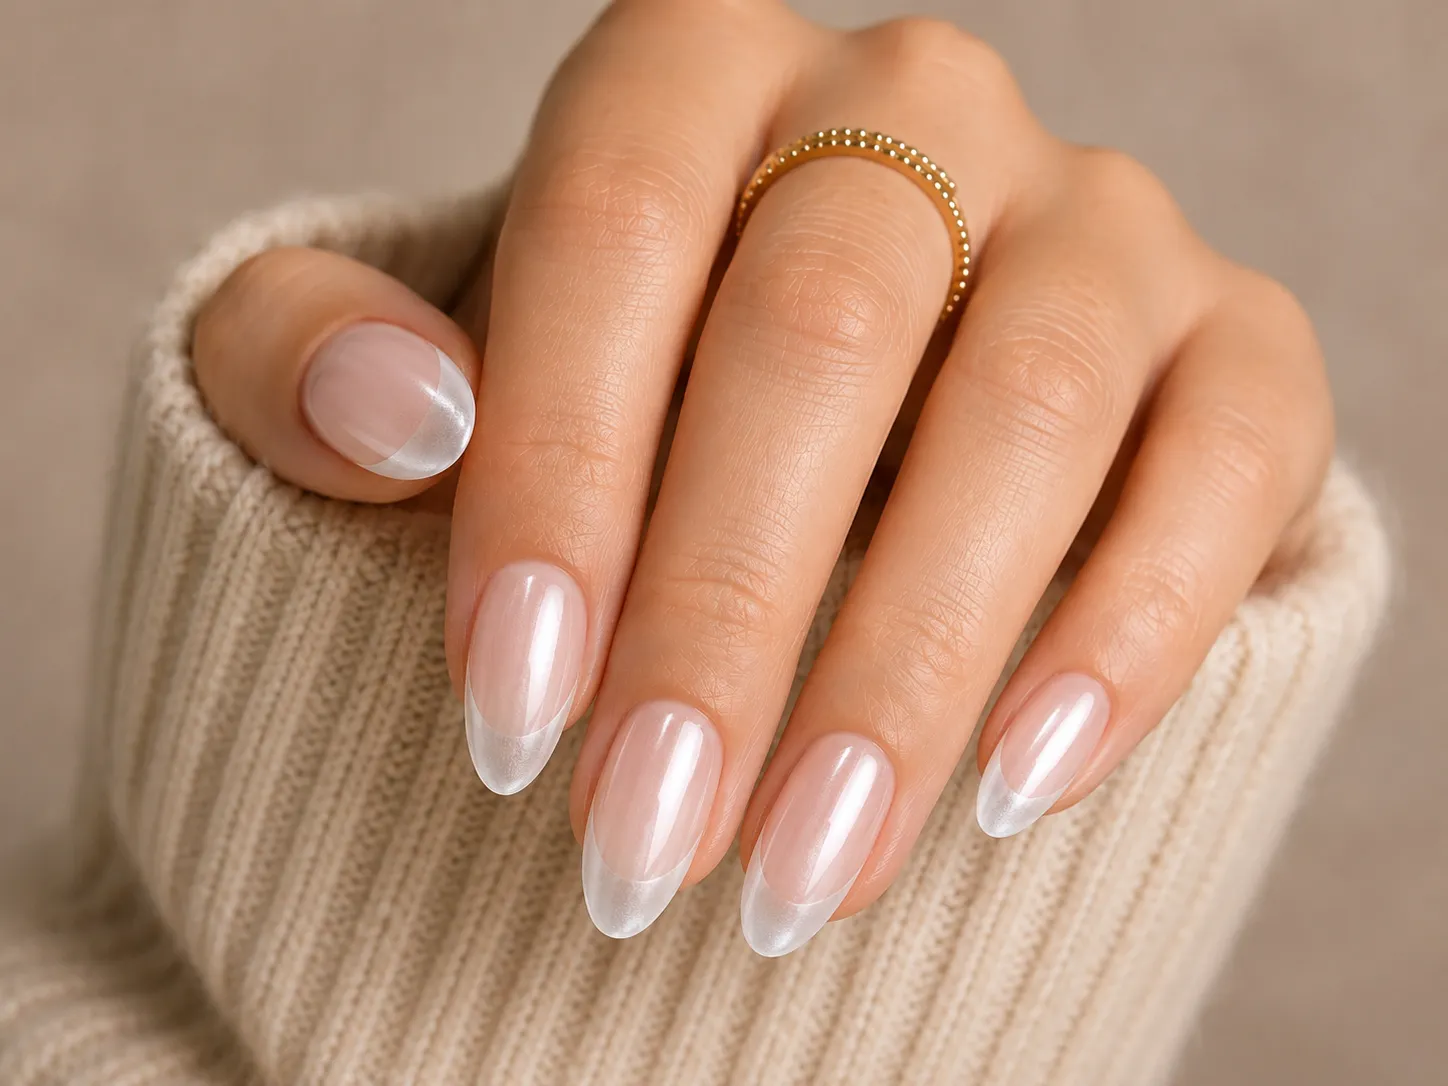
These four versions are visually distinct without asking the finish to do something unrealistic. They also give the article enough variation while avoiding difficult fantasy effects, excessive nail art, and near-duplicate images that would add little value.
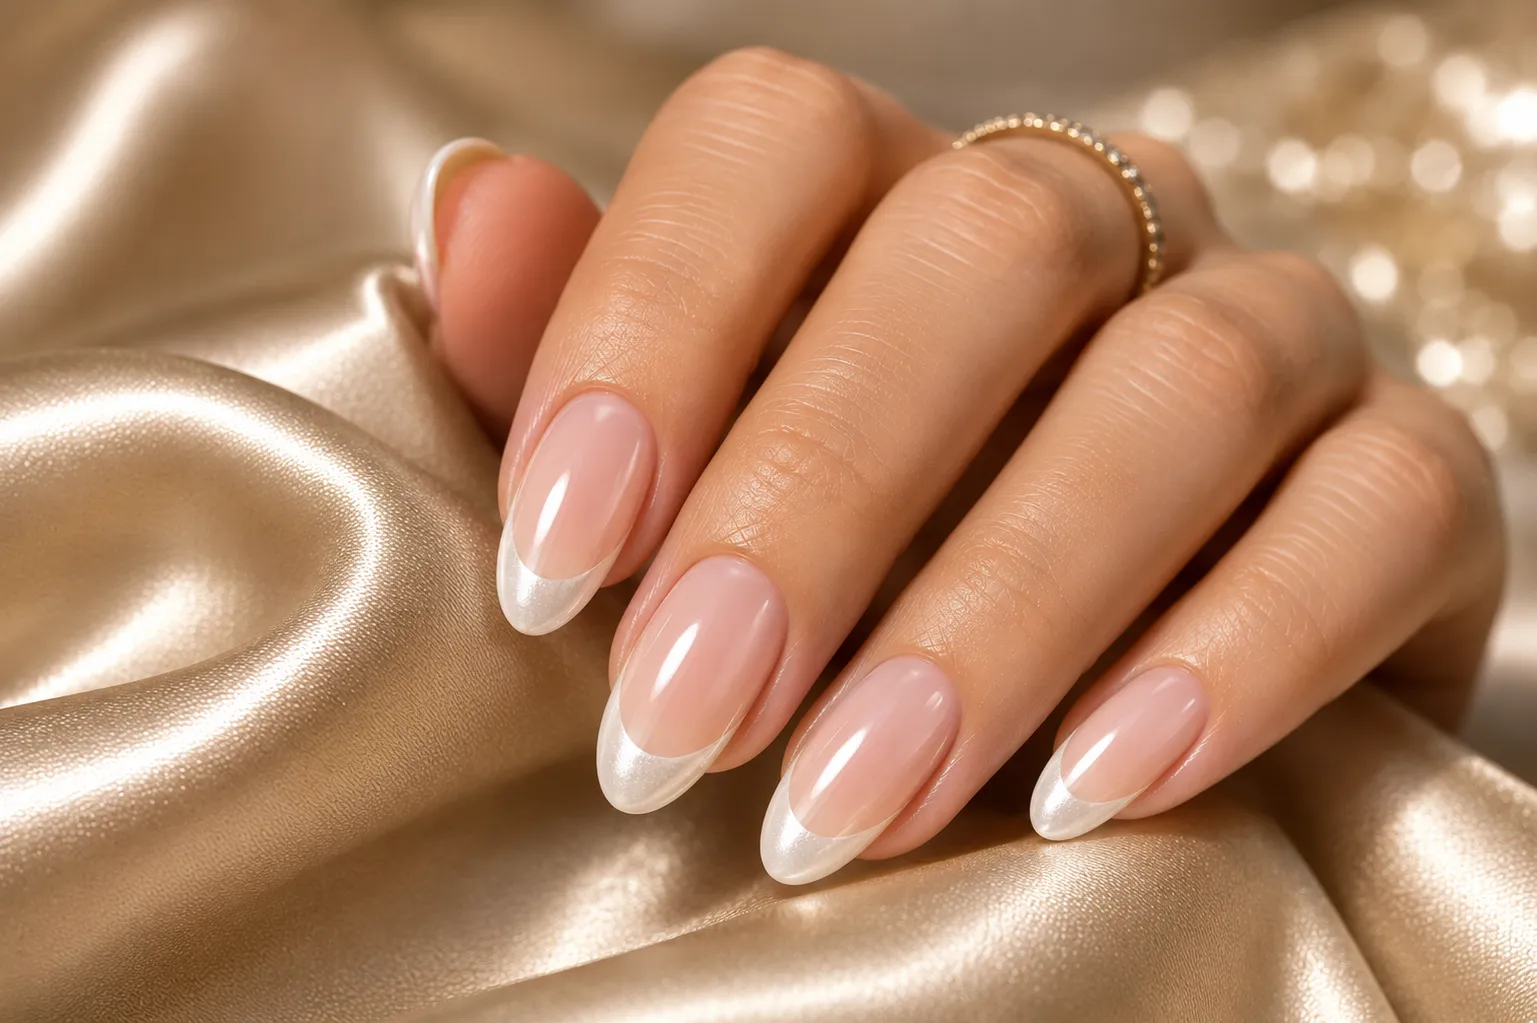
What Makes a Glazed French Tip Different?
A full glazed donut manicure can use a uniform milky base and pearl veil across the entire nail. A glazed donut French tip needs one additional requirement: the free edge must remain intentionally defined. That edge can be crisp, softly diffused, or micro-thin, but it should not disappear beneath the shimmer.
The finish is also different from chrome French tips. Chrome aims for a stronger metallic reflection. Glaze uses finer, lighter-looking pearl so the color beneath remains readable.
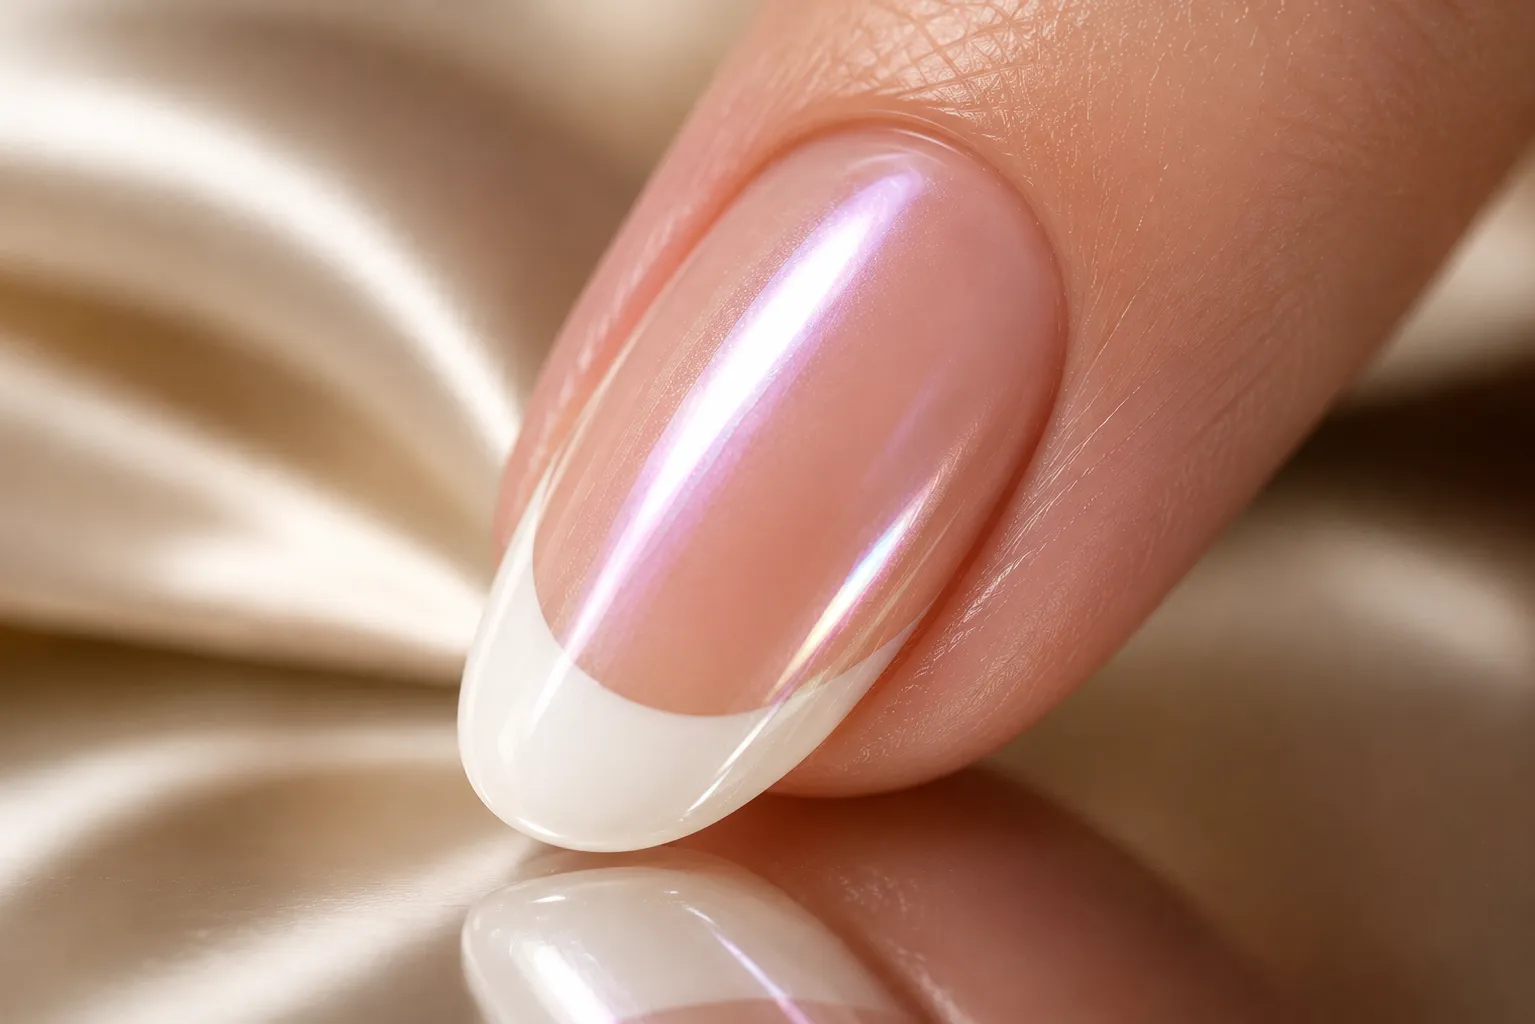
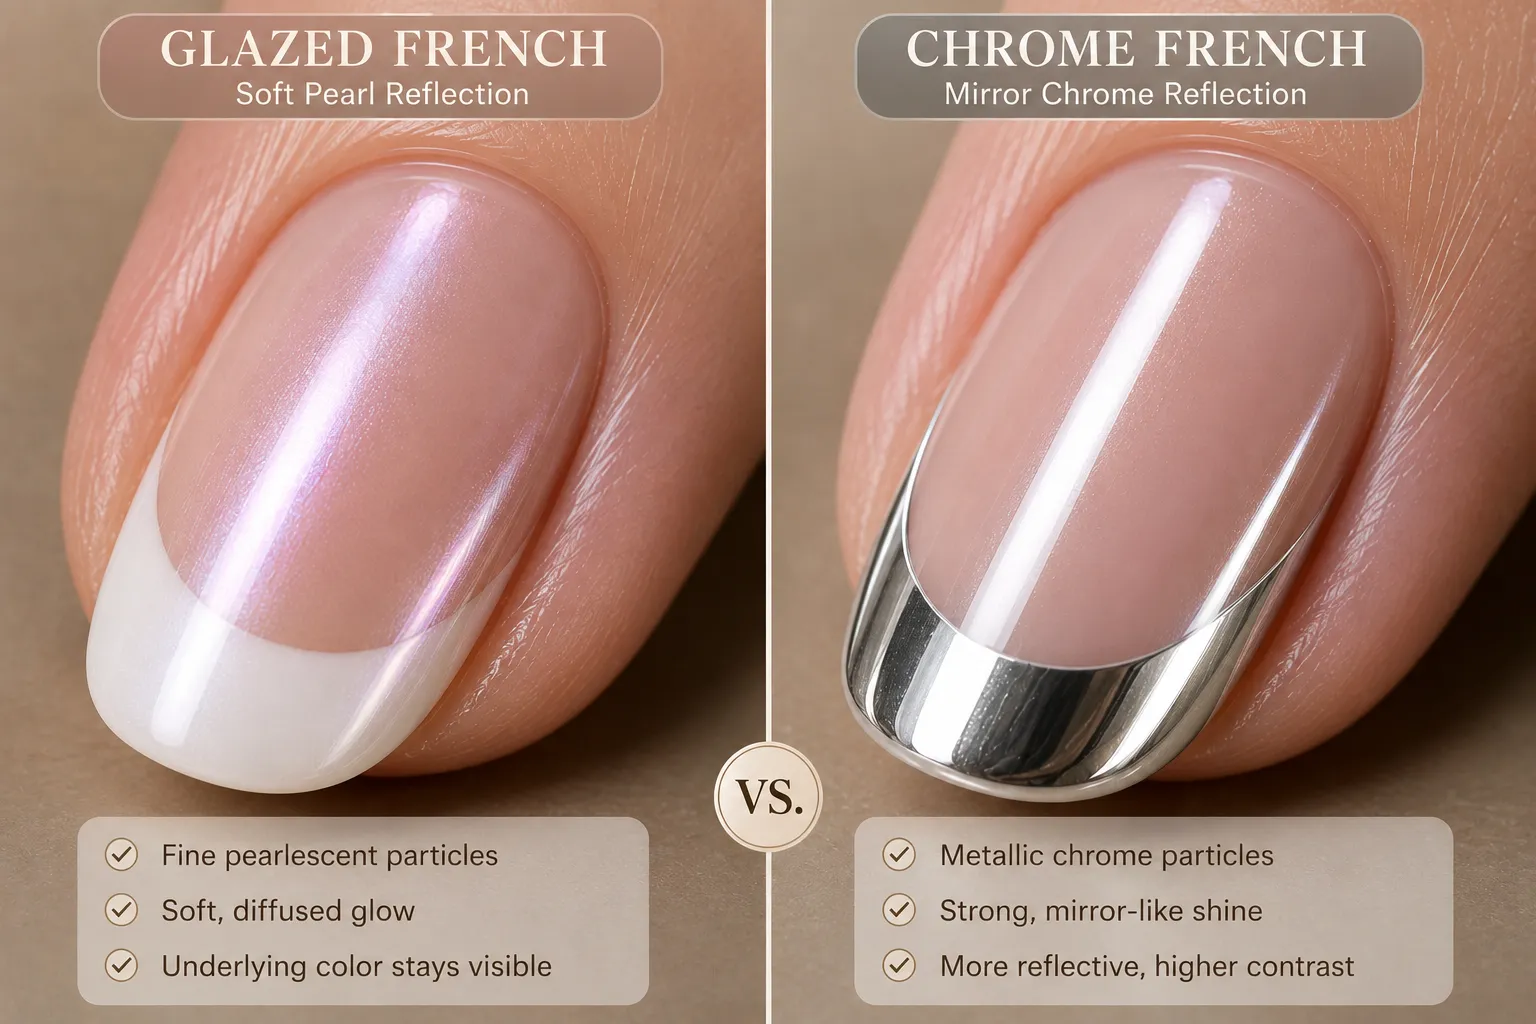
A good glaze softens the French tip. It does not erase it or replace it with a metal surface.
Loose Pearl Powder vs. Pearlescent Gel Topcoat
Both methods can produce a polished result. The practical difference is how much depth and control you want, and how softly the pearl layer should sit over the French design.
| Feature | Loose Pearl Powder | Pearlescent Gel Topcoat |
|---|---|---|
| Application | Fine powder is lightly rubbed or dusted over a compatible cured gel layer | Pre-mixed shimmer is brushed on like an ordinary gel topcoat |
| Visual depth | Usually more dimensional and reflective | Usually softer, flatter, and easier to control |
| French visibility | Excellent when applied lightly; can become metallic if overworked | Predictable, although some formulas may look more glittery than pearly |
| Difficulty | Higher; uneven pressure or excess powder can create cloudy patches | Lower; brush application is more familiar and consistent |
| Best for | Dimensional editorial or bridal finishes | Subtle everyday glazed French manicures |
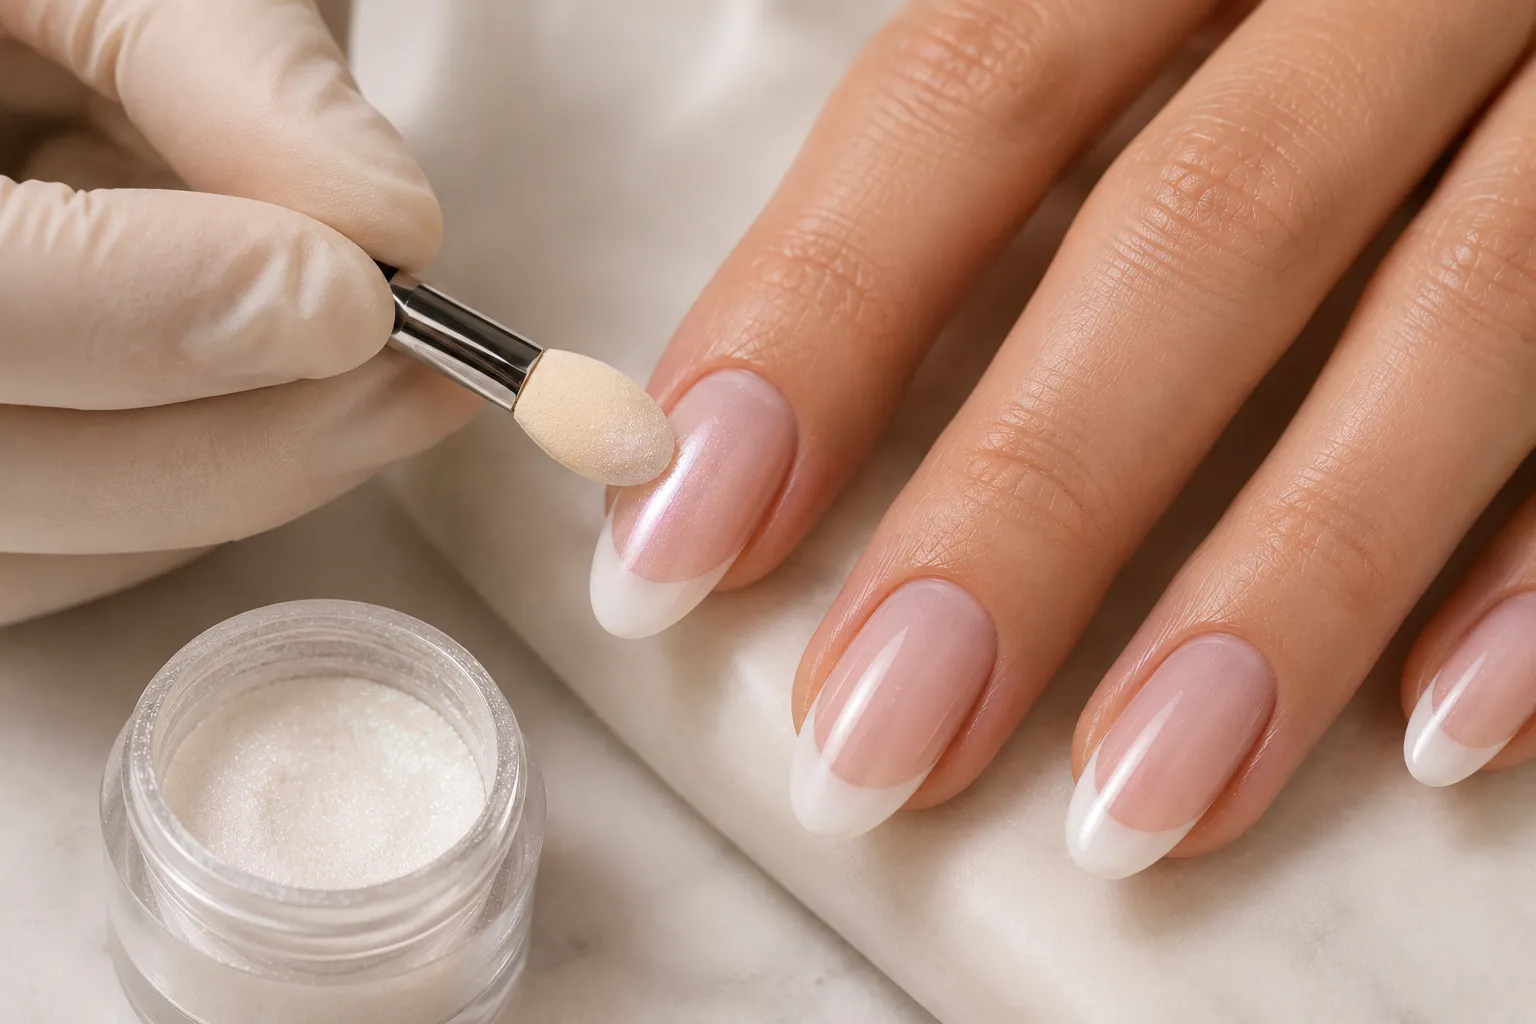
Ask whether the finish uses loose pearl powder or a pearlescent gel topcoat, and request a soft glaze rather than full chrome. Show the desired base undertone and tip width separately so the technician can control each layer.
How Salons Build Glazed Donut French Tips
Prepare and refine the nail
Shape the free edge, complete careful cuticle preparation, and remove surface oil and dust.
Apply the sheer base
Use thin coats of blush, nude, milk, or vanilla gel so the base remains translucent and even.
Paint the French edge
Build a proportionate white or milky smile line and refine both corners before curing.
Create the powder layer
Apply and cure the bonding gel recommended for the chosen pearl powder system.
Add a restrained pearl veil
Use light, even pressure so the shimmer softens the manicure without hiding the tip.
Seal the surface and free edge
Remove loose particles, apply a smooth compatible topcoat, cap the free edge, and cure fully.
The Anatomy of a Clean Glazed French Tip
The manicure should be judged in layers. A strong result has a harmonious base, an intentional smile line, controlled pearl density, clean sidewalls, and a continuous reflection that does not break over bumps or powder patches.
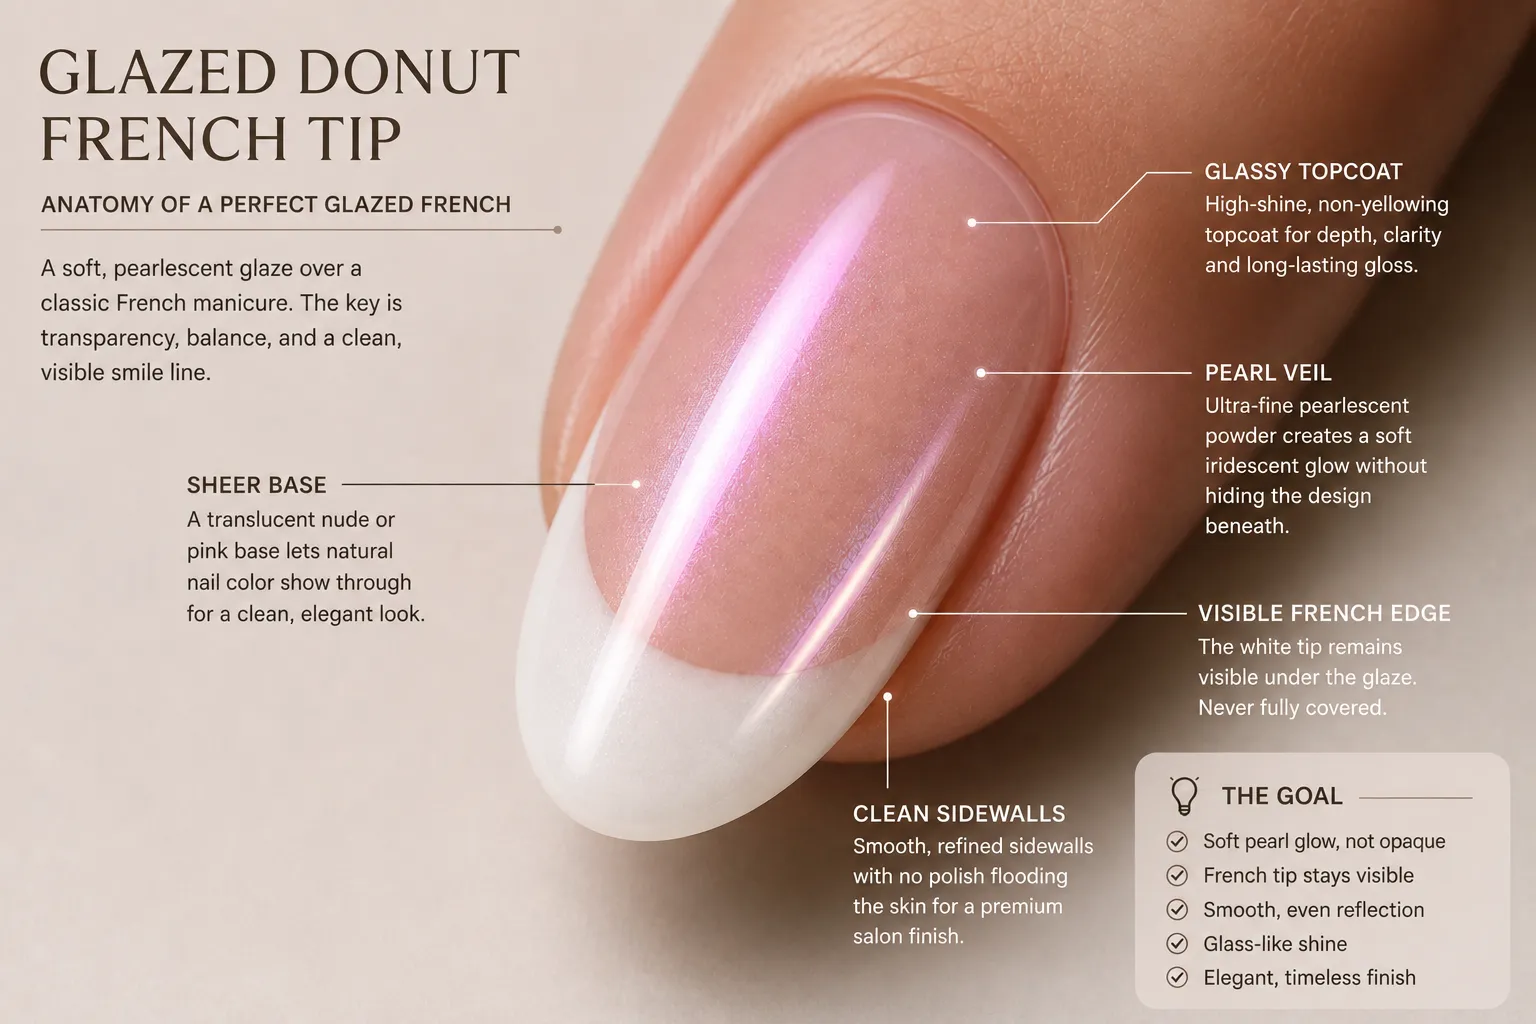
| Zone | What good work looks like | Common failure |
|---|---|---|
| Base | Sheer, even, and matched to the skin | Patchy, grey, chalky, or excessively opaque |
| French edge | Clearly visible and proportionate to nail length | Lost beneath the glaze or widened into a block tip |
| Pearl density | Fine and evenly distributed across the surface | Bald spots, heavy metallic areas, or obvious glitter particles |
| Sidewalls | Cleanly sealed without powder or gel touching the skin | Rough corners, exposed edges, or shimmer buildup |
| Surface | Continuous reflection with no dips, ridges, or cloudy zones | Broken light lines that reveal texture or uneven topcoat |
Five Nail Shapes That Show the Glaze Clearly
The glaze can work on almost any well-prepared shape, but these five are practical to generate accurately and visually different enough to deserve separate examples.
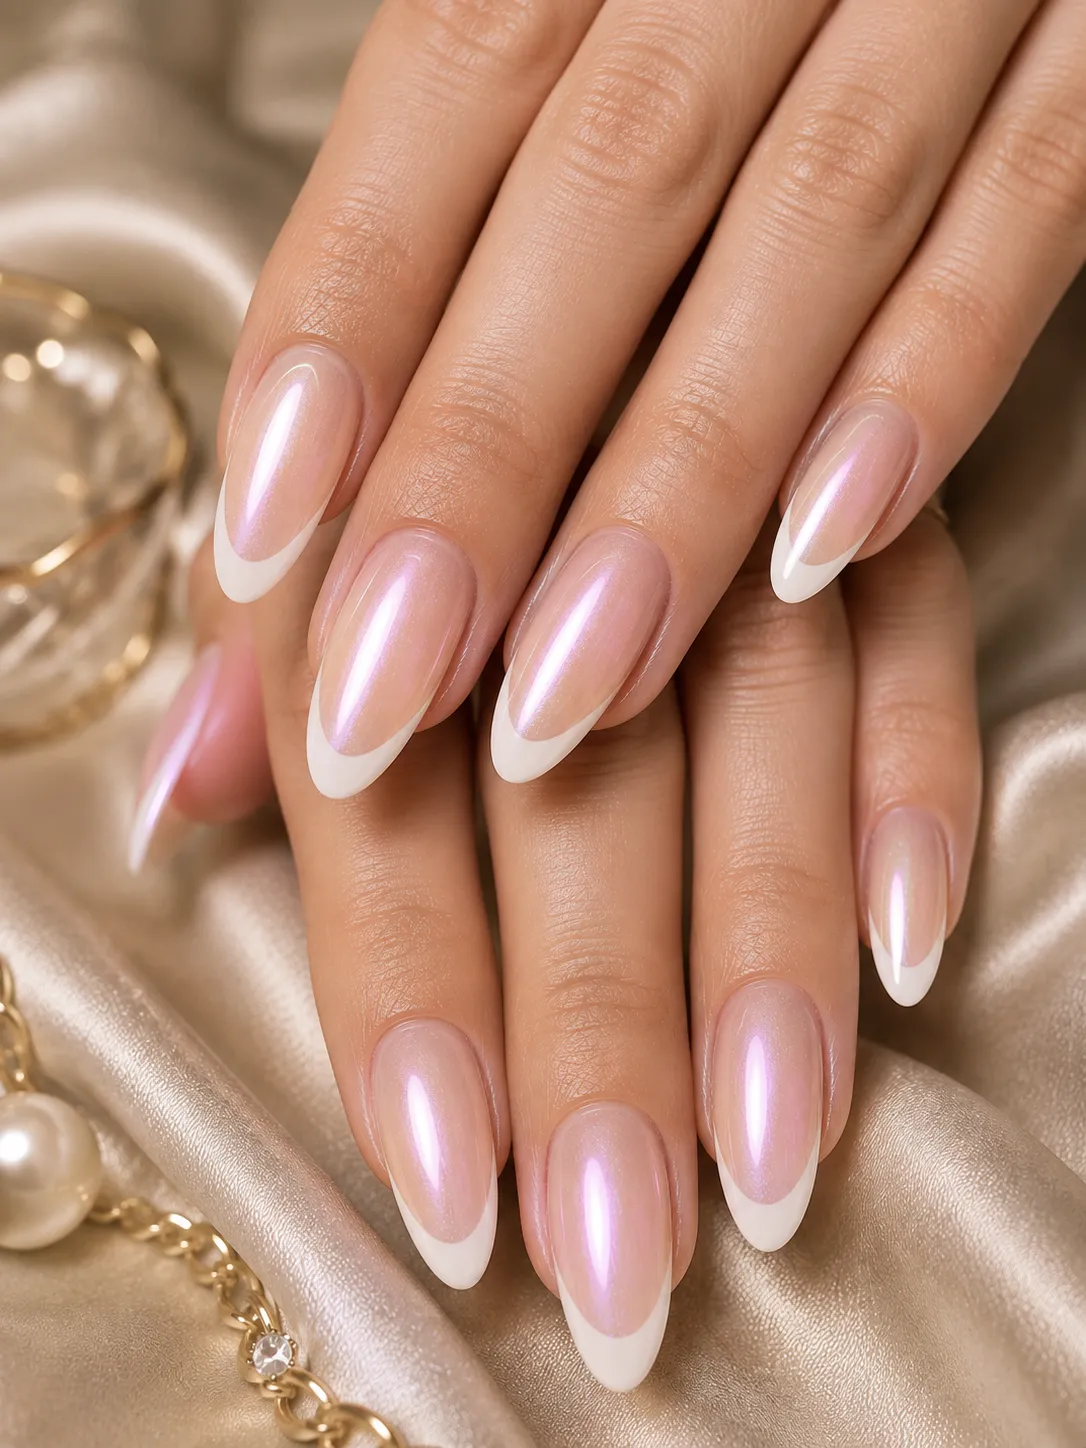
Almond
The tapered silhouette concentrates the central reflection while keeping the white edge elegant.
Explore almond French tips →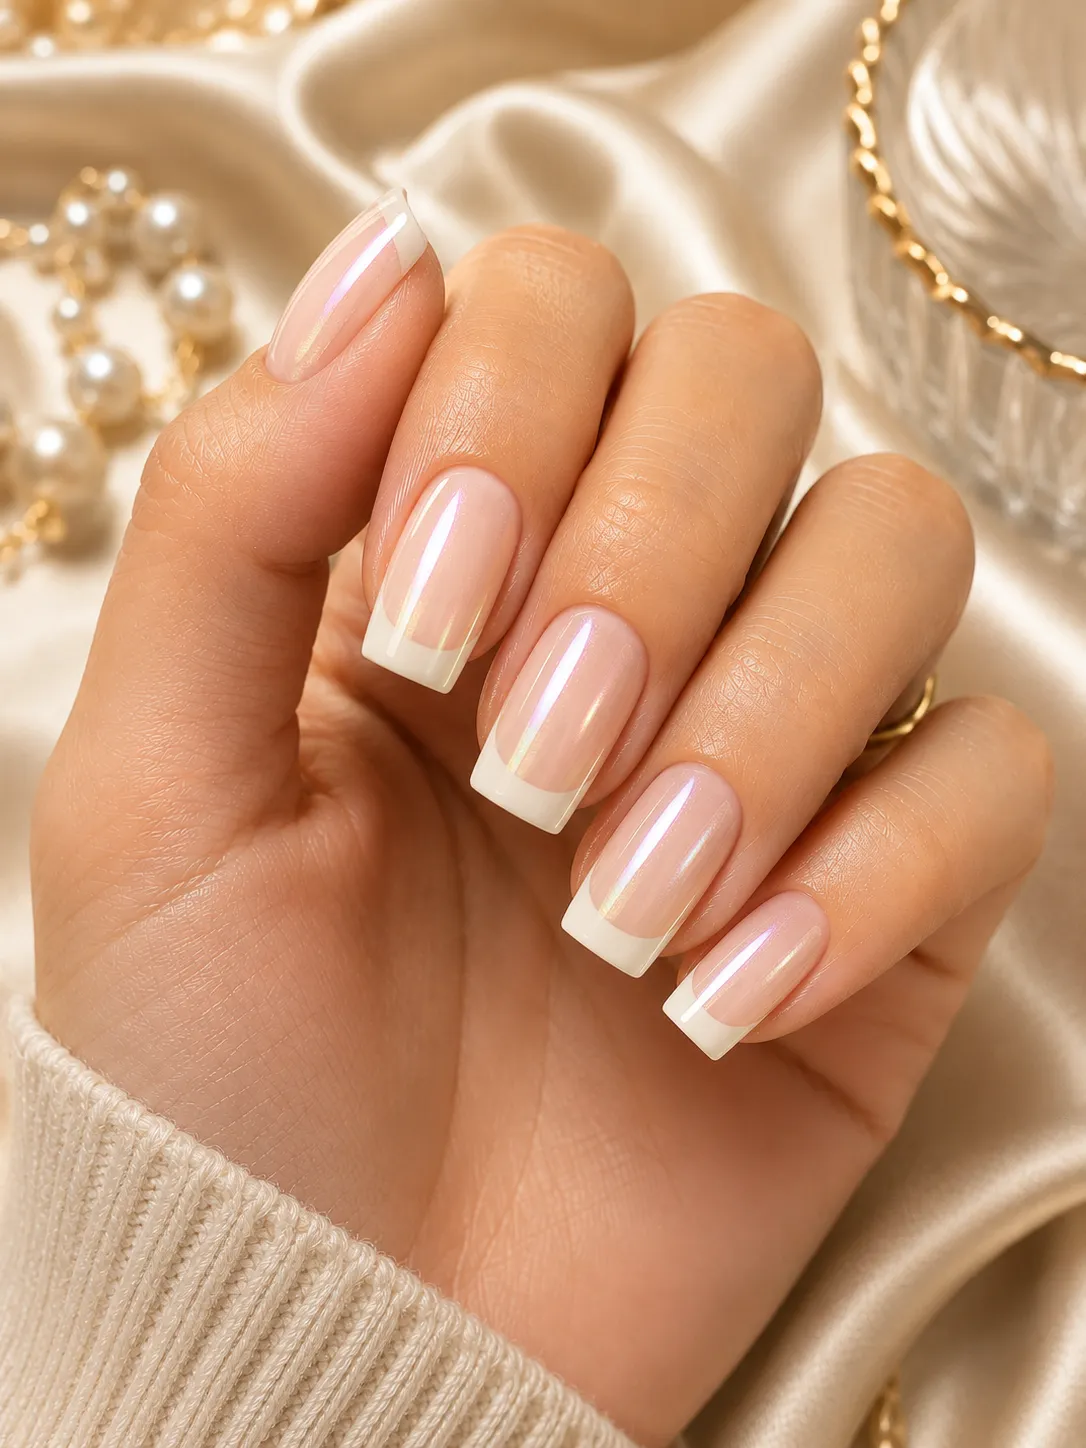
Square
The flat free edge makes the French placement easy to see beneath the pearl veil.
Compare square French tips →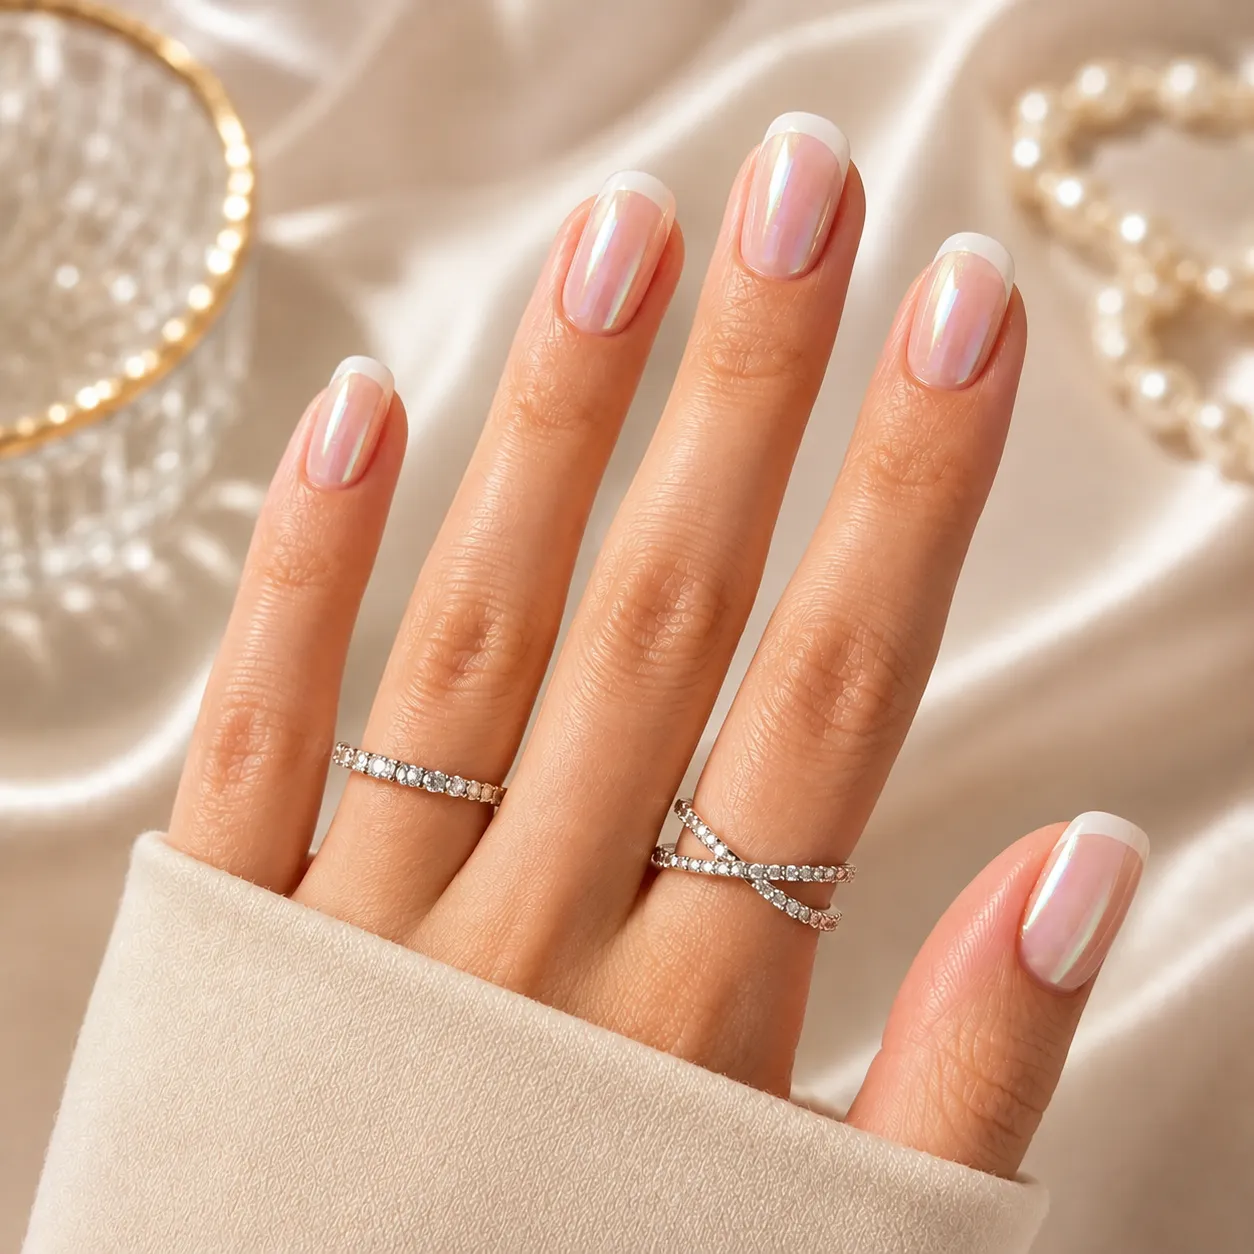
Squoval
A broad surface displays the glaze evenly while softened corners make the manicure easier to wear.
See the squoval guide →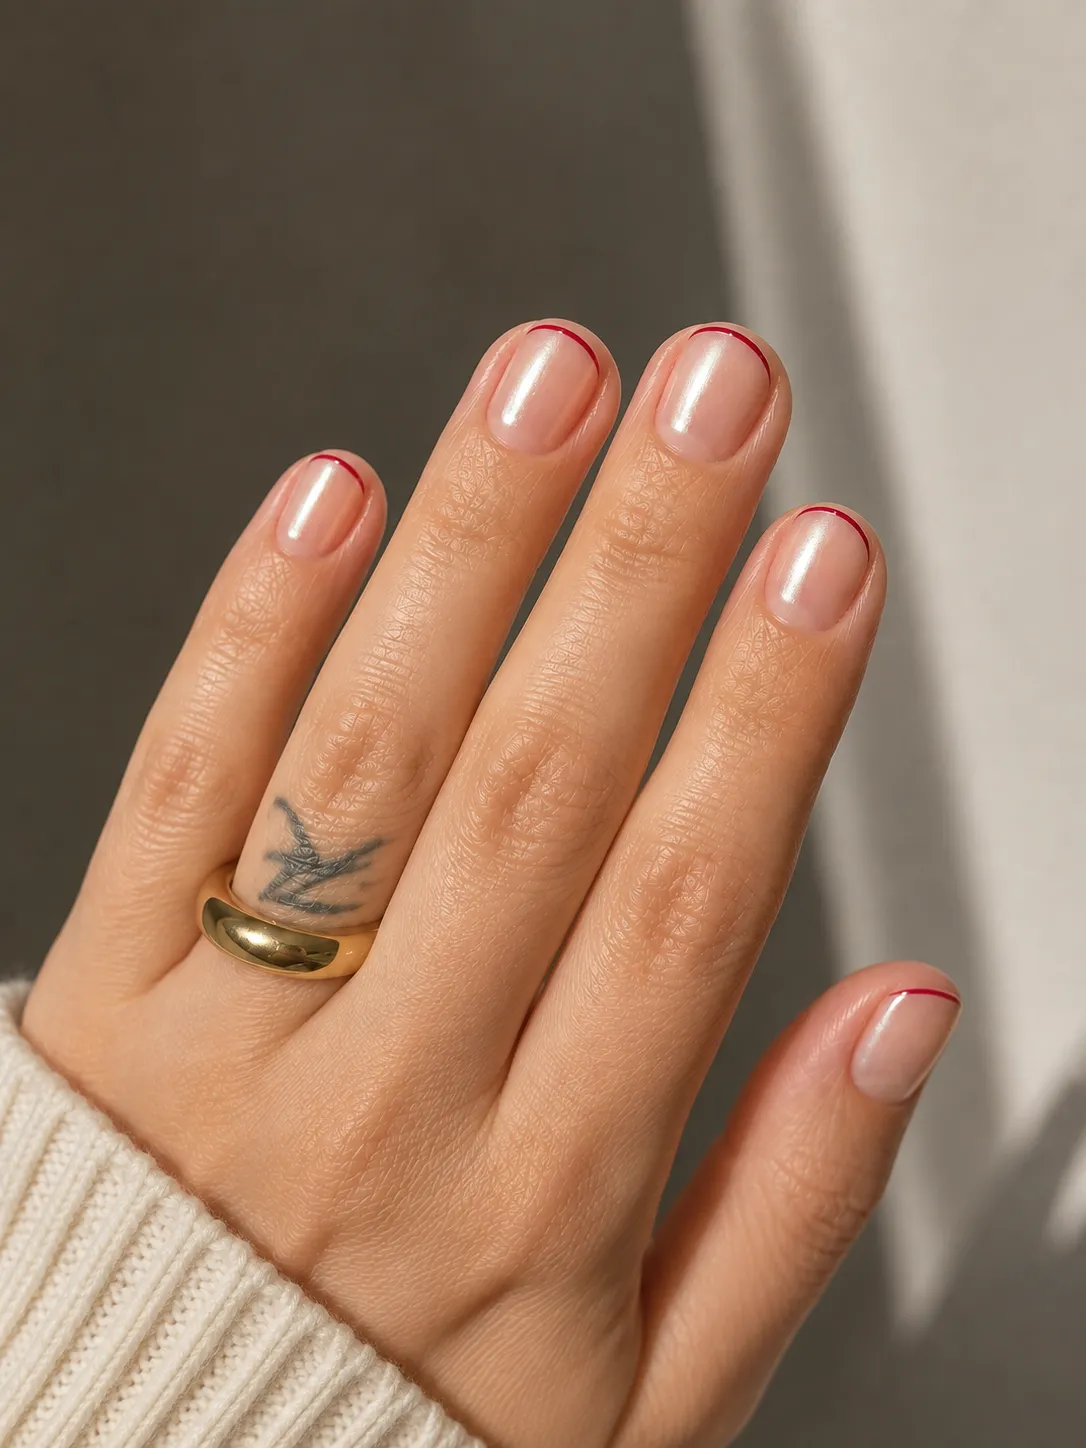
Short Round
A narrow micro edge preserves visible nail-bed length and keeps the pearl effect controlled.
See the micro-French guide →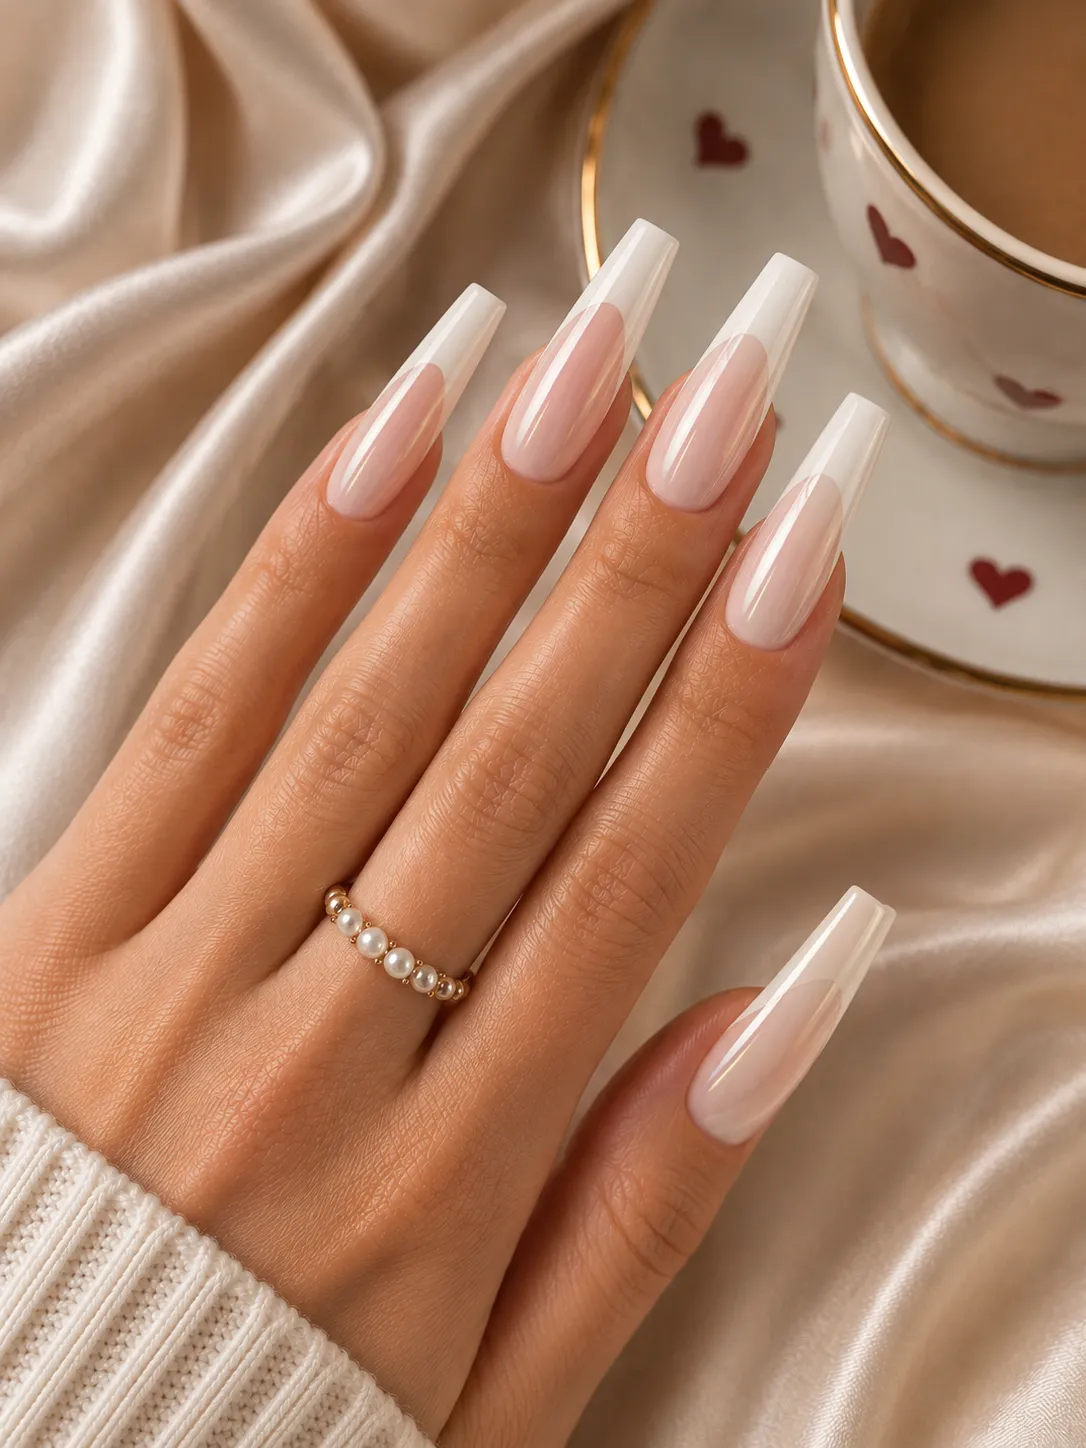
Coffin
The larger surface shows more pearl movement, but the French edge should remain controlled rather than oversized.
How to Match the Glaze to Your Skin Tone
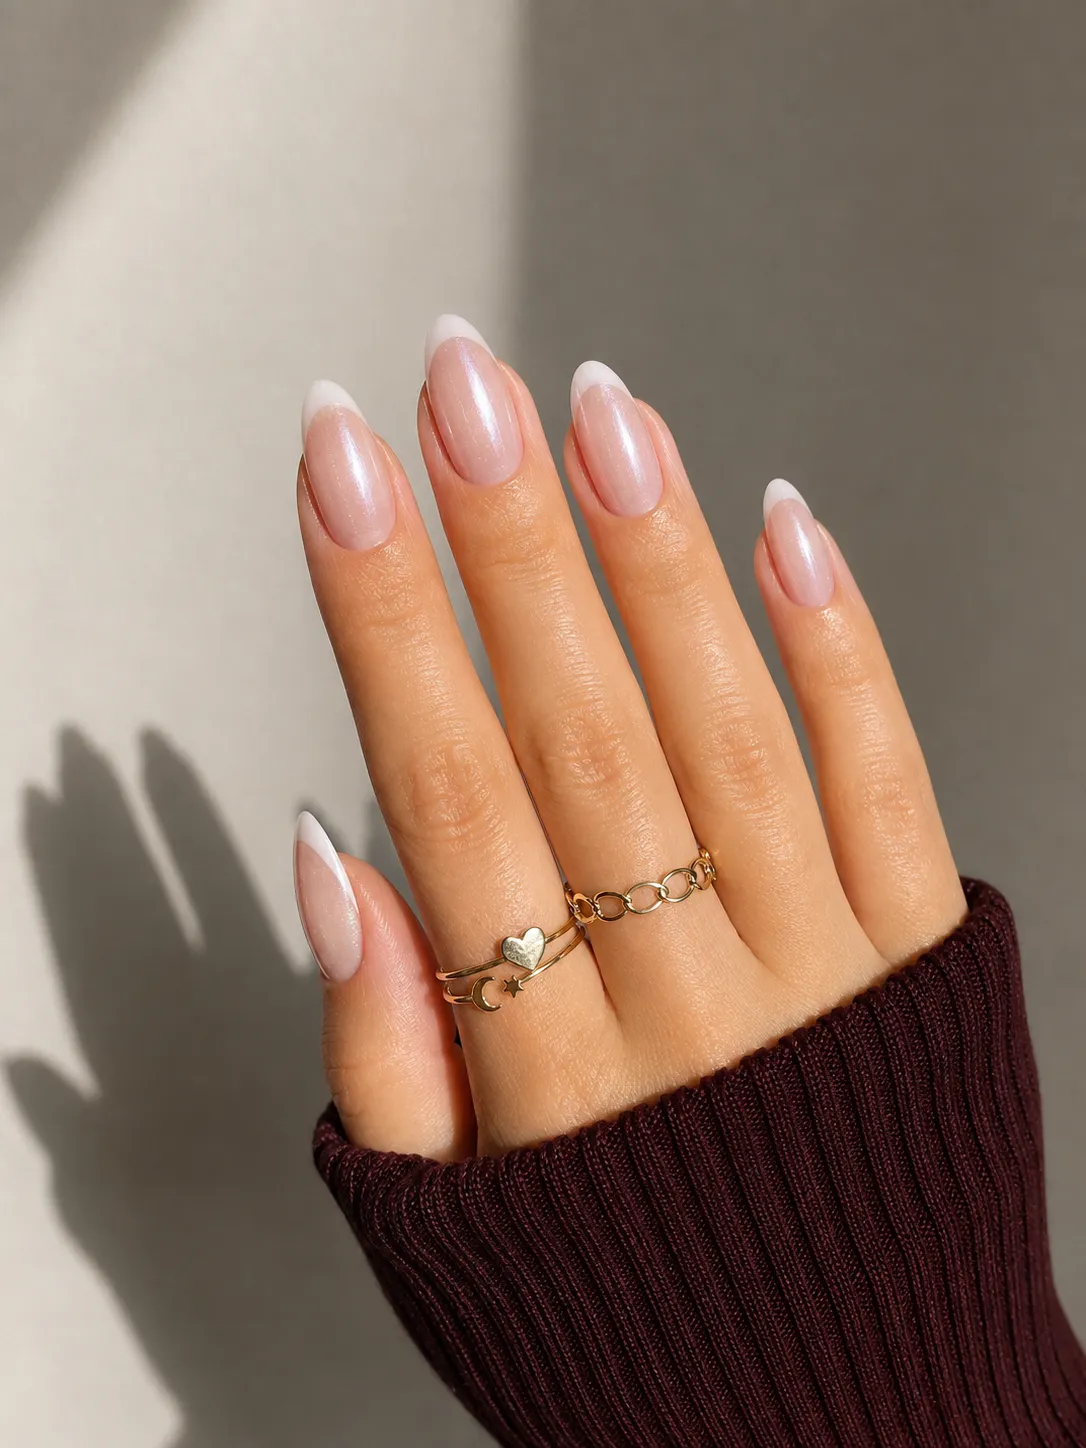
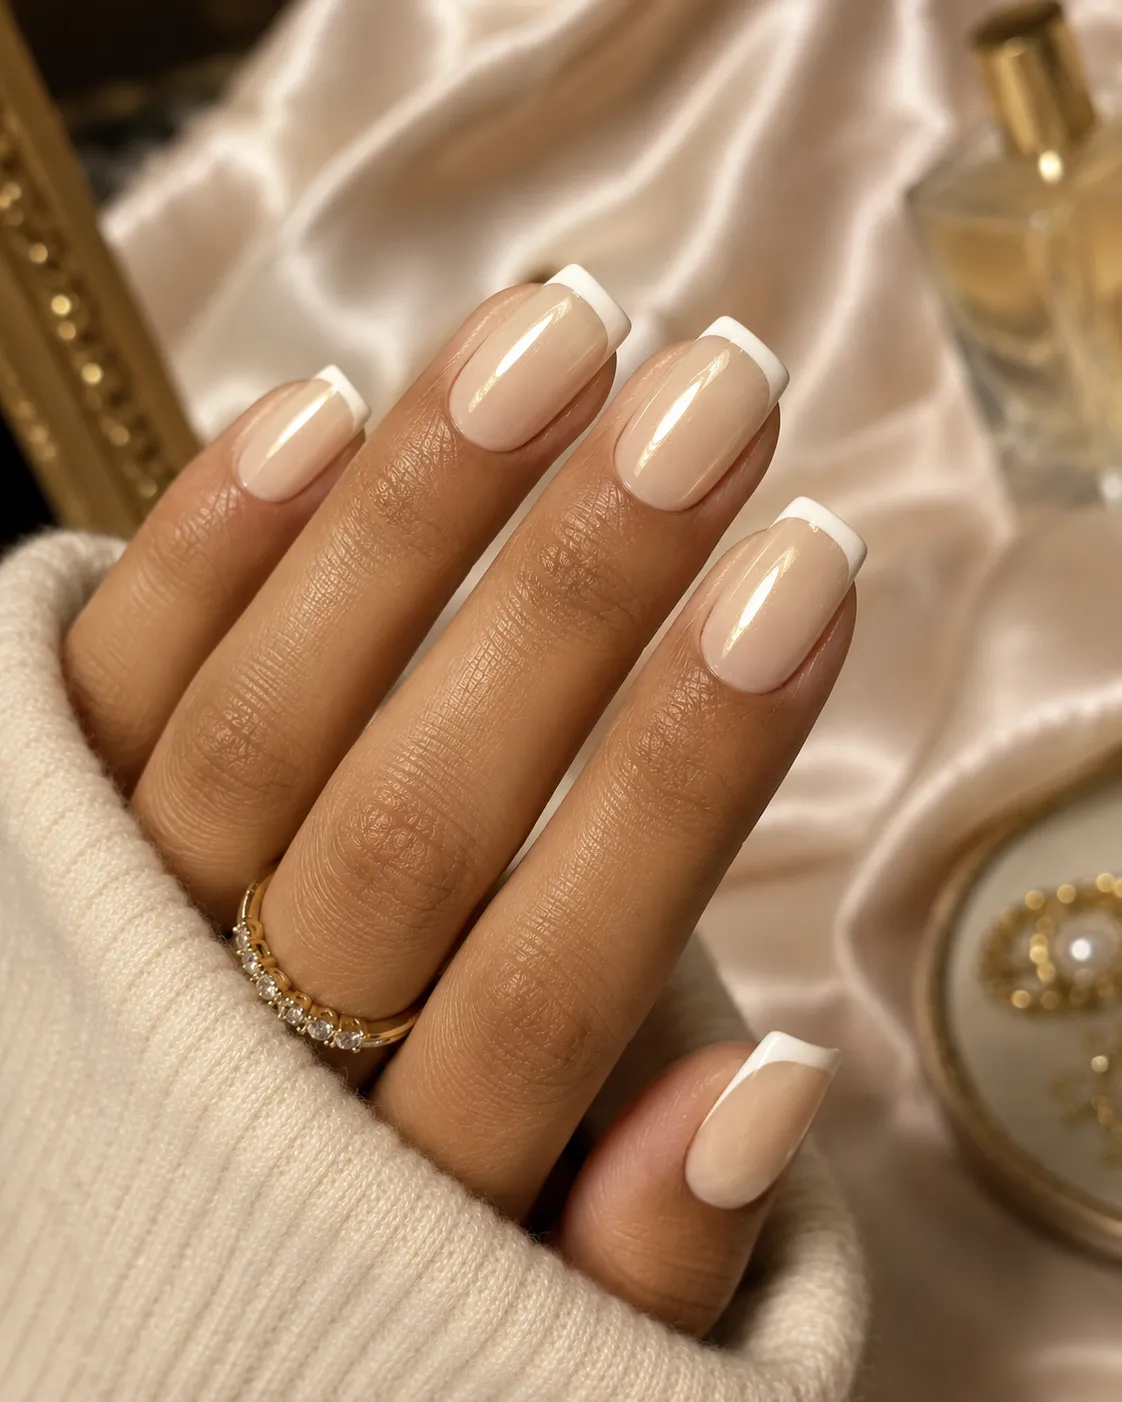
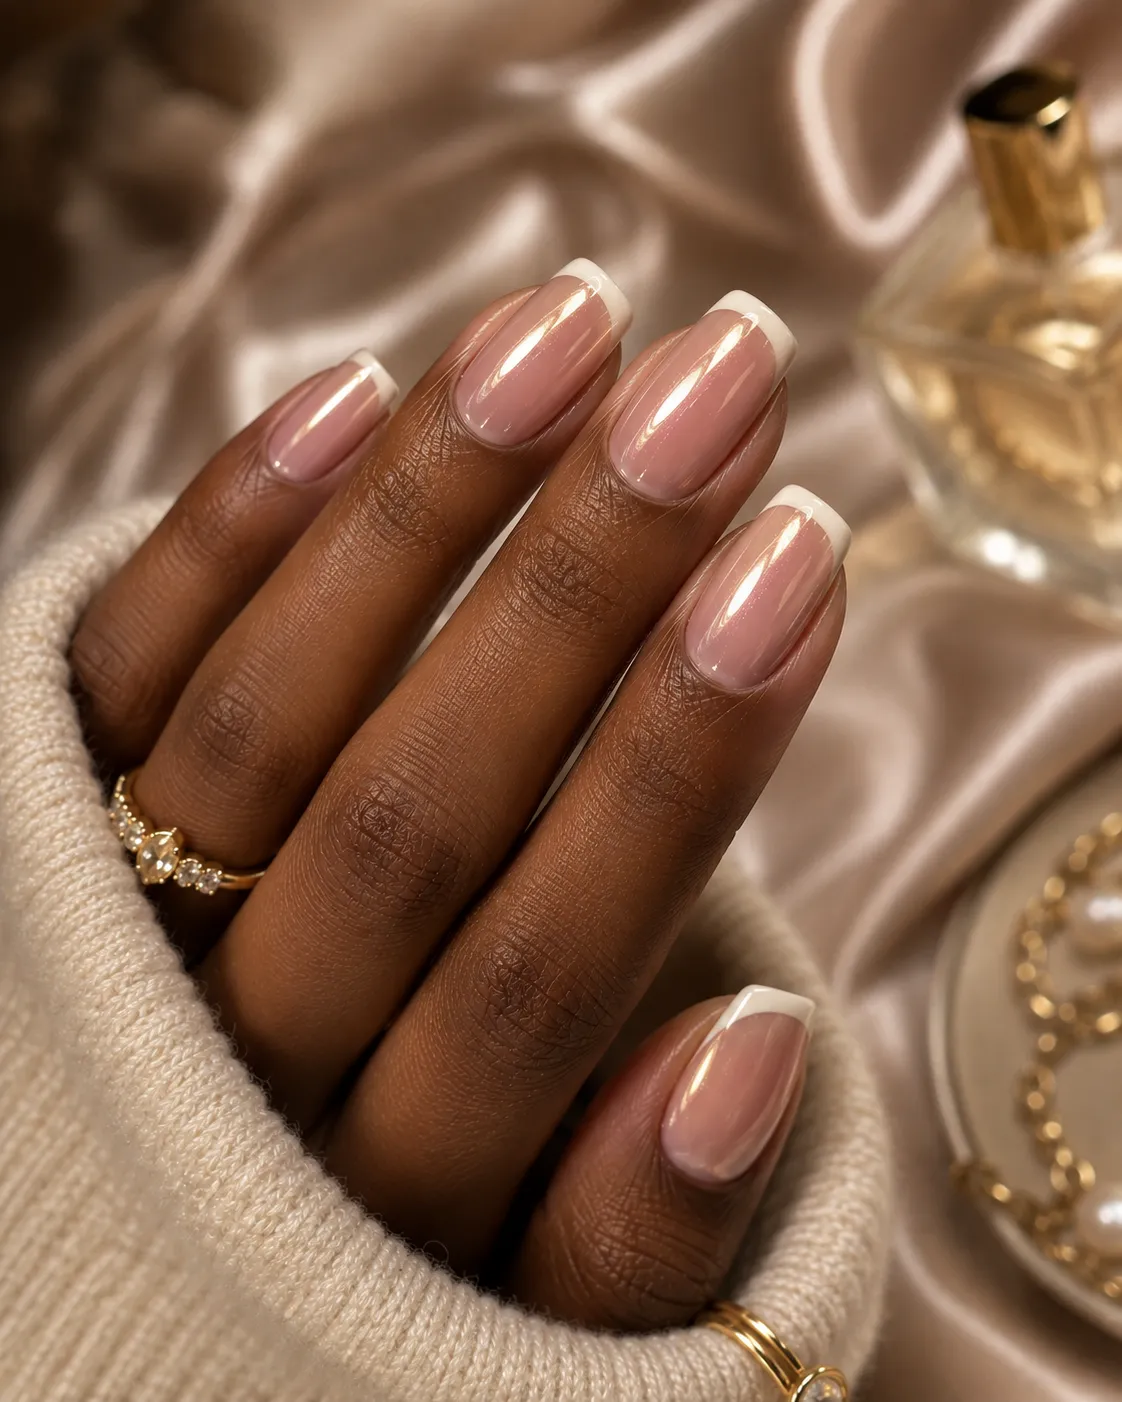
Pearl powder reflects the undertone of the base beneath it. An icy milk base can look elegant on one hand and grey on another, while a warm vanilla base may harmonize beautifully with golden undertones but look yellow beside cool skin. Swatching the base before adding powder is more reliable than choosing the pearl effect alone.
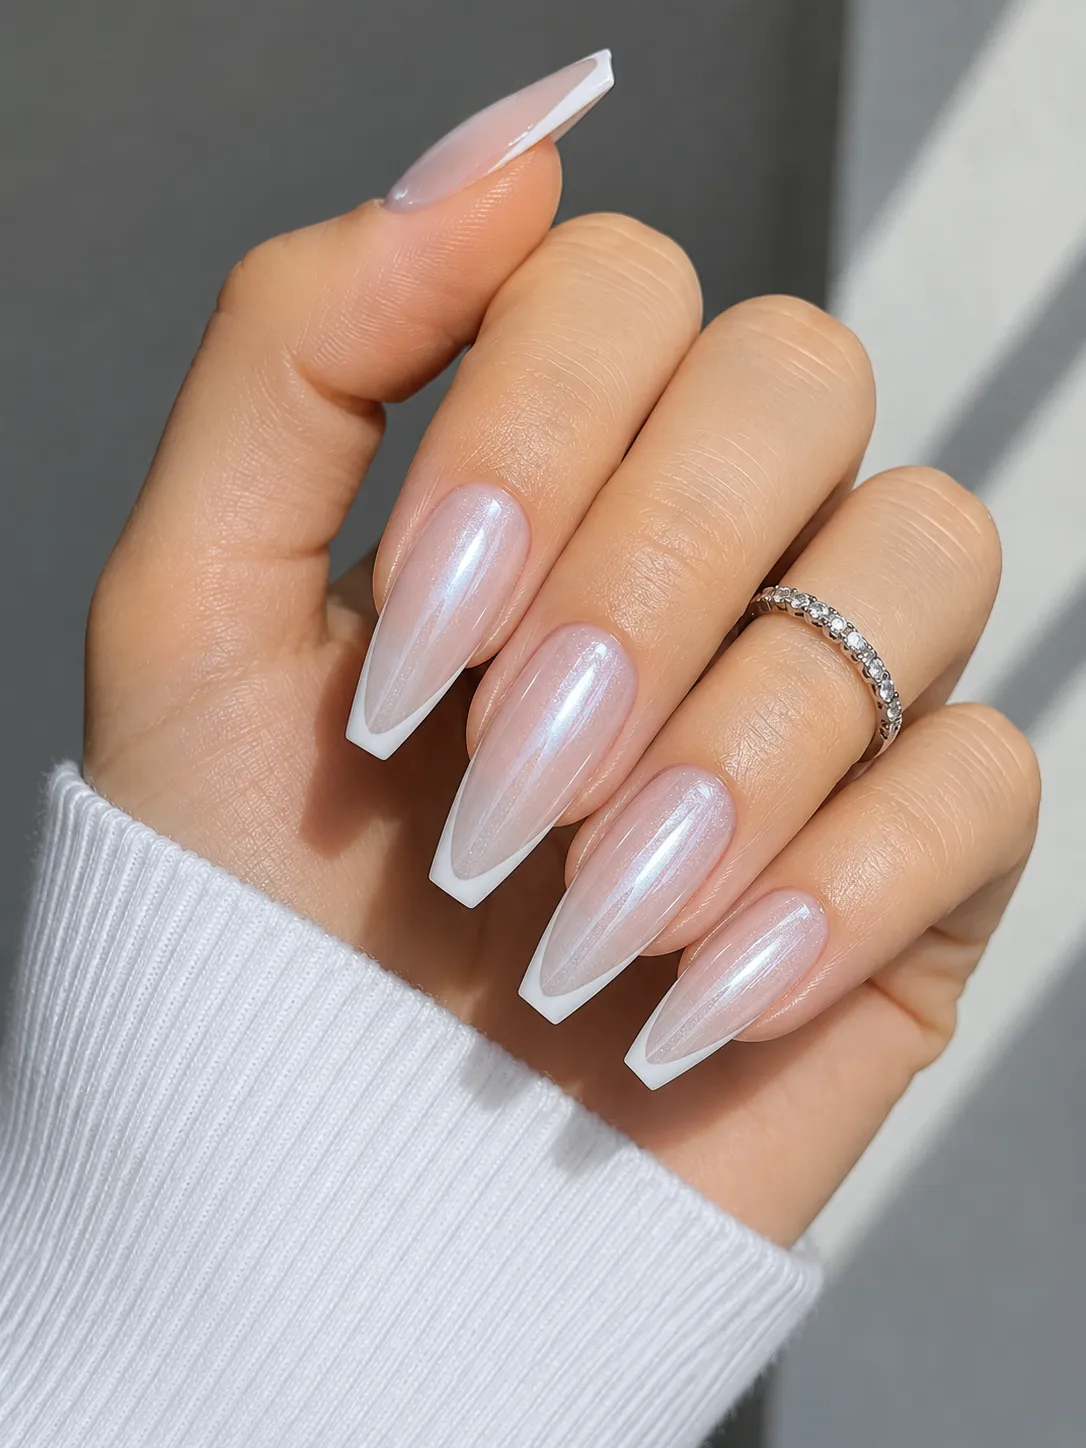
Icy Milk & Soft Pink
Cool milk and translucent pink can keep the finish bright without introducing yellow warmth.
Balanced Blush
A neutral pink-beige base works with both cool pearl reflection and mixed-metal jewelry.
Vanilla & Warm Nude
Creamier bases often integrate more naturally with golden undertones and warm metals.
Rose, Caramel-Milk & Vanilla
Warm rose and creamy nude bases preserve luminosity without creating a stark or chalky cast.
Ask the technician to swatch two sheer base shades directly beside the hand before the white tip and pearl layer are added. Judge the base in neutral or natural light rather than relying only on the salon lamp.
Choose the Glaze by Mood and Occasion
Glazed French tips do not need a different manicure for every event. The more useful decision is how much contrast, warmth, and pearl reflection you want. These four directions cover the occasions most readers are likely to shop, save, or show to a technician.
Classic Pearl Almond
Choose a sheer blush base, a controlled white edge, and a restrained pearl veil that photographs well beside rings, lace, satin, and neutral tailoring.
Short Glazed Micro-French
Use a narrow tip and subtle glaze for a polished effect that remains low-contrast and easy to style with daily clothing.
Vanilla Glaze
A warm cream-nude base works especially well with gold jewelry, tan fabrics, and sunlit styling without needing extra nail art.
Stronger Pearl, Same French Structure
Increase the pearl reflection slightly for low light, but stop before the surface becomes mirror-like or the white edge disappears.
Change the base undertone and pearl intensity before adding decoration. Glazed French tips already rely on reflected light, so extra crystals, charms, or painted art can quickly make the design feel busier rather than more luxurious.
The Salon-Quality Glazed French Checklist
Pearl reflection can disguise flaws in a still photograph, but it also exposes uneven texture when the hand moves. Inspect the manicure from above, from the side, and under a moving light source before accepting the finished set.
Eight signs the glaze is genuinely well executed
The manicure should remain balanced under direct light, side light, and ordinary movement.
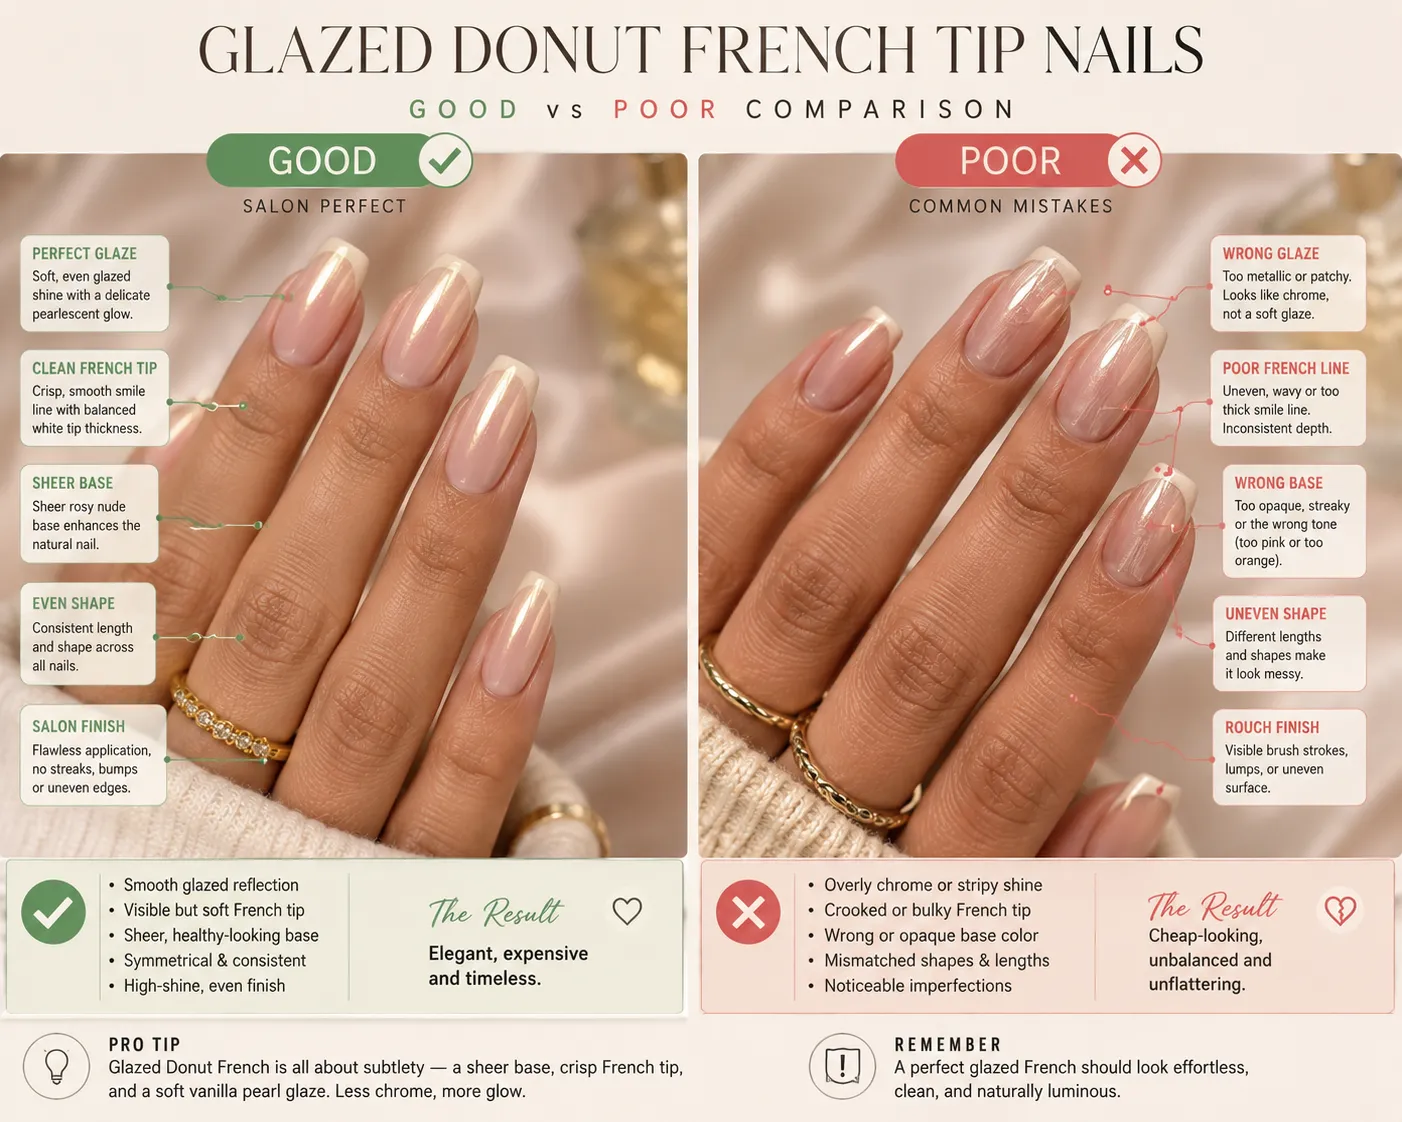
Avoid These Glazed French Tip Mistakes Before Leaving the Salon
The problems are often subtle. A set may look attractive at first glance but lose the defining French structure, show inconsistent reflection, or appear chalky once the hand moves away from the salon lamp.
Look straight down for French-tip balance, move the hand under light for pearl consistency, tilt sideways for surface smoothness, and inspect the free edge for sealing.
Cost, Wear Time, and Maintenance
Glazed French tips may cost more than a plain French manicure because the service adds a pearl layer, product compatibility requirements, additional curing, powder cleanup, and careful topcoat sealing. Loose-powder application may also carry a nail-art or chrome-powder supplement.
| Service | Typical U.S. Range | Main Variable |
|---|---|---|
| Natural-nail gel glazed French | About $50–$75 | Base service, French supplement, and pearl application |
| Builder gel or BIAB glazed French | About $65–$95 | Overlay structure, length, and salon location |
| Extension set with glazed French tips | About $80–$130+ | Extension system, length, shape, and design complexity |
Properly prepared gel or builder-gel glazed French tips commonly remain presentable for around two to three weeks. The underlying material may still be secure while the topcoat begins to dull at the free edge or show fine surface scratches.
Pricing and wear vary by location, technician experience, nail length, product system, preparation, lifestyle, and aftercare. Loose powder, bonding gel, and topcoat should be compatible, and removal must follow the instructions for the actual enhancement system used.
How to Keep the Glaze Clear
Apply cuticle oil regularly, wear gloves during prolonged cleaning or wet work, and avoid abrasive scrubbing. Do not buff a dull glazed surface at home: abrasion removes gloss and can expose or disturb the pearl layer beneath it.
For system-specific care, compare Gel X, acrylic, and BIAB. Use the removal method required by the underlying product rather than peeling or forcing lifted material.
Is a Glazed Donut French Tip Right for You?
Do you want soft pearl or a mirror-metallic finish?
A restrained pearl veil keeps the base and French edge visible.
Chrome is designed for a harder, more opaque reflective surface.
How much nail length do you have?
Almond, square, squoval, and coffin shapes provide room for a visible pearl-softened edge.
A narrow tip preserves visible nail-bed length and prevents the finish from looking heavy.
How much contrast do you want?
A visible white edge beneath a light pearl veil retains strong French structure.
An almost-clear base and subtle edge create the quietest version.
Glazed donut French tips work best when the tip, base, and pearl layer remain visually distinct.
The finish should soften the manicure without making it cloudy, glittery, or indistinguishable from full chrome.
How Much Glaze Should You Ask For?
“Glazed” is not one fixed level of reflection. The safest way to communicate the finish is to choose the pearl intensity separately from the base shade and French-tip width.
What to Ask for at the Salon
“I want glazed donut French tips with a sheer [cool pink / neutral blush / warm vanilla] base, a [micro / medium] white or milky smile line, and a soft pearlescent veil rather than full chrome. Keep the French edge visible, apply the pearl evenly, clean the sidewalls, and seal the free edge with a smooth glossy topcoat.”
The Final Verdict
Glazed donut French tip nails are strongest when they still look deliberately French. Almond creates the most flowing reflection, square shows the clearest edge, squoval is the most practical, short round suits a micro line, and coffin provides a larger editorial surface without requiring extreme length.
Classic pearl glaze is the most recognizable option, strawberry adds romance, vanilla warms the finish, and frosted glass creates the quietest result. Regardless of variation, the defining standard remains the same: a translucent base, a controlled tip, fine even pearl, clean sidewalls, and an uninterrupted glassy surface.
Frequently Asked Questions
What are glazed donut French tip nails?
Glazed donut French tip nails combine a recognizable French free edge with a thin pearlescent veil and glossy topcoat. The finish should look softly luminous rather than opaque, glittery, or mirror-metallic.
Are glazed donut French tips the same as chrome French tips?
No. Chrome French tips aim for a stronger metallic reflection, while glazed donut French tips use a lighter pearl effect that allows the base color and French structure to remain visible.
Do glazed donut French tips work on short nails?
Yes. Short nails usually look best with a narrow white or milky micro-French edge beneath a restrained pearl glaze so the visible nail bed is not shortened.
What base color is best for glazed donut French tips?
Sheer blush, translucent nude, milky pink, or warm vanilla bases work well. The best option depends on skin undertone and how much contrast is wanted between the base and the French edge.
How long do glazed donut French tip nails last?
Properly prepared gel or builder-gel glazed French tips commonly remain presentable for around two to three weeks. The reflective surface may show dulling or free-edge wear before the underlying gel fails.
Can glazed donut French tips be created without loose pearl powder?
Yes. A pearlescent gel topcoat can create a softer version of the effect, although loose pearl powder usually produces greater depth and a more dimensional glazed reflection.
Why do glazed donut nails sometimes look cloudy?
Cloudiness can come from an overly opaque base, excessive pearl powder, uneven powder bonding, incompatible products, or a textured topcoat. Thin compatible layers generally produce the clearest finish.